Get on Track: Installing Wood Fence Rails Like a Pro
22
Sep
2025
Author:
Rob Thibeault
Why Proper Rail Installation Is the Foundation of Every Great Fence
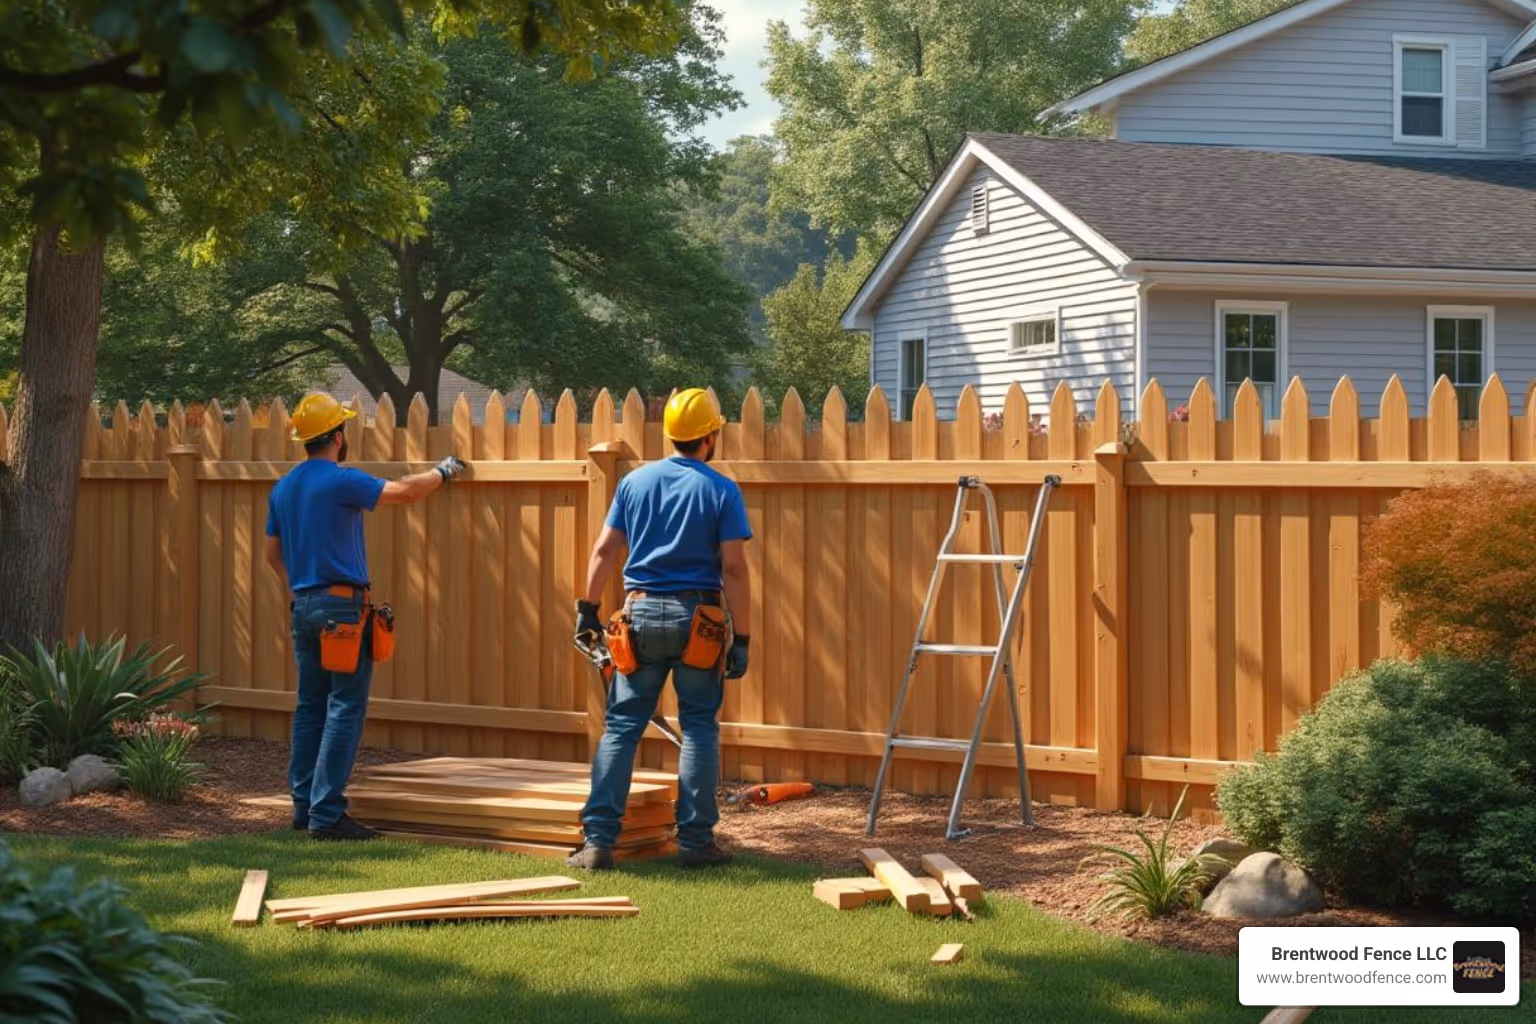
Installing wood fence rails correctly is what separates a fence that lasts decades from one that starts sagging within a few years. Rails - also called stringers - are the horizontal support beams that connect your fence posts and provide the framework for attaching pickets or boards.
Plan rail placement - Top rail 7-8" from fence top, bottom rail 7-8" from ground
Use proper spacing - One rail for every 24" of fence height (3 rails for 6' fence, 2 for 4' fence)
Mark posts accurately - Use mason's line and level for consistent placement
Join rails at post centers - Ensures maximum strength and stability
Secure with proper fasteners - Two 16-penny nails or 3" exterior screws per rail end
Follow the grade - Rails should flow with your yard's natural contours
Most fence failures happen because the rails weren't installed properly from the start. When rails bow, sag, or pull away from posts, your entire fence becomes unstable. The pickets start to warp, gaps appear, and what should have been a 20-year investment becomes a repair headache.
The good news? Professional rail installation techniques are straightforward when you understand the fundamentals. Whether you're working with cedar, pressure-treated pine, or other lumber, the same principles apply: precise measurement, proper fastening, and attention to structural details.
Properly installing wood fence rails starts with a solid plan. This professional planning phase is what separates a fence that lasts for decades from one that fails prematurely. Your fence's purpose—whether for privacy, pet containment, or curb appeal—dictates its height, rail placement, and materials. A six-foot privacy barrier has different structural needs than a decorative garden fence.
Key planning steps include:
Property Lines: We recommend setting posts about four inches inside your property line to prevent footings from encroaching on neighboring land.
Local Codes: Building codes for height, setbacks, and materials vary across New Hampshire, Massachusetts, and Maine. Adhering to them is essential for a safe, legal installation.
Utilities: Before digging, calling 811 is a non-negotiable, legal requirement. This free service from Dig Safe marks underground utility lines to prevent dangerous and costly accidents.
Post Spacing: Standard spacing is six to eight feet between posts, but this can be adjusted based on fence height, wind load, and soil conditions. This spacing directly impacts rail quantity and placement.
How Many Rails Are Needed?
The structural integrity of your fence depends on the correct number of rails. The professional standard is one rail for every 24 inches of fence height.
A six-foot fence requires three rails per section (top, middle, and bottom). The top and bottom rails provide the main frame, while the middle rail is crucial for preventing pickets from warping and twisting due to weather changes.
A four-foot fence typically needs two rails (top and bottom). The shorter pickets are less prone to bowing, though a third rail can be added for extra stability in high-wind areas.
Getting the rail count right is essential for accurate material calculations and a durable final product. If you're exploring different fence styles or heights, more info about privacy fence options can help you make the best choice for your property.
Standard Rail Placement and Post Spacing
Precise rail placement is essential for both appearance and structural integrity.
Top Rail: Positioned seven to eight inches from the fence top, providing solid support for pickets and allowing space for an optional cap rail.
Bottom Rail: Placed seven to eight inches from the ground, with a minimum of six inches of clearance from the soil. This gap is critical for preventing moisture damage and rot.
Middle Rail: Evenly spaced between the top and bottom rails to distribute load and provide consistent support for all pickets.
For post spacing, we use a professional standard of 7 feet, 10 inches on center. This measurement is designed to maximize the strength of standard eight-foot rails by ensuring joints land squarely on the center of the posts. This creates a continuous, robust structural line capable of withstanding New England weather.
The Professional Process for Installing Wood Fence Rails
With the posts set, the professional process of installing wood fence rails can begin. This phase transforms individual posts into a unified, strong framework. The process moves from precise marking to secure fastening, with each step ensuring the fence's long-term stability and appearance.
Marking Rail Placement Accurately
Accurate marking is non-negotiable for a professional result. An error of even an inch can create a wavy, uneven fence line. The process involves:
Marking each post at the precise height for each rail, starting flush with the edge of the first post for a clean look.
Using a mason's line and a line level to transfer marks accurately from post to post, ensuring a perfectly straight line, especially over long distances or on slopes.
Employing guide blocks or cleats as temporary guides clamped to posts. This ensures consistent height for every rail without repeated measuring.
Using a combination square to ensure marks are perfectly square on each post.
Careful measurement on the first few posts sets the standard for the entire fence.
Attaching and Joining Rails for Maximum Strength
The rail-to-post connection is critical for a fence's longevity. Professional techniques ensure maximum strength:
Fastening: We use either two sixteen-penny nails or, for superior holding power, three-inch exterior-rated screws per rail end. Pre-drilling pilot holes is a key step to prevent the wood from splitting.
Centering Joints: The strongest installations occur when two rails meet, or butt together, at the exact center of a post. This provides maximum surface area for fastening.
Staggering Joints: For ultimate strength, we stagger the joints of the top, middle, and bottom rails across different posts. This distributes stress evenly along the entire fence line, preventing weak points.
Face-mounting is the preferred method over toe-screwing, as it avoids creating pockets where water can collect and cause decay.
Best Practices for Installing Wood Fence Rails on Slopes
Sloped properties require a specific approach to ensure the fence flows with the landscape. There are two primary professional methods:
Racking: The rails are installed parallel to the ground's slope, creating a smooth, continuous line that follows the natural contour of the land. This method is ideal for component-built fences on gentle to moderate slopes.
Stepping: The fence is built in level sections that step up or down the slope. This creates a more formal, architectural look and is often used for steeper grades.
For both methods, maintaining a minimum of six inches of ground clearance for the bottom rail is critical to prevent rot and moisture damage. The choice between racking and stepping depends on the steepness of the slope and the desired aesthetic.
Choosing the Right Hardware and Materials
The longevity of your fence is directly tied to the quality of its components. When installing wood fence rails, selecting the right wood, fasteners, and hardware is essential for withstanding the New England climate, from harsh winters to humid summers. Investing in quality materials reduces long-term maintenance and repair costs. While cheaper options are tempting, they often lead to premature failure. For a complete breakdown of what to expect, you can find more info on the cost of wood fence installation on our website.
Fasteners: Screws vs. Nails vs. Brackets
Fasteners are the critical connection points holding your fence together. The choice between them involves a trade-off in cost, strength, and installation speed.
Fastener Type
Cost
Strength
Installation Speed
Appearance
Notes
Nails
Low
Good
Fast
Visible heads, can be driven flush
Traditional choice; use 16-penny for rails, 6-penny for pickets. Can loosen over time with wood movement. Avoid splitting by pre-drilling.
Screws
Moderate
Excellent
Moderate
Visible heads, can be countersunk
Superior holding power; lock materials up tight. Use exterior-rated, rust-free (galvanized/stainless steel) screws. Pre-drilling recommended to prevent splitting.
Brackets
Moderate-High
Excellent
Moderate
Can be visible or hidden, depending on type
Provide strong, mechanical connection. Galvanized fence brackets are common. Hidden L-brackets or specialized systems (e.g., EZ-Hide) offer cleaner aesthetics. Often used for split rail fences.
Nails: The traditional, cost-effective choice. Sixteen-penny nails are used for rails. Their main drawback is a tendency to loosen over time as wood expands and contracts.
Screws: Offer superior holding power that keeps materials tight. We use exterior-rated, rust-free screws ideal for the New England climate.
Brackets: Provide the strongest mechanical connection. Options range from standard galvanized brackets to hidden systems for a cleaner look.
Crucially, all fasteners must be rated for pressure-treated lumber. Galvanized or stainless steel is required to prevent corrosion from the chemicals in treated wood, which would otherwise compromise the fence's structural integrity. For more details, see this information on working with pressure-treated lumber.
Key Considerations for Installing Wood Fence Rails
Beyond fasteners, several other material and design choices are key:
Wood Species:Cedar offers natural resistance to rot and insects and is less prone to bowing. Pressure-treated pine is a durable, cost-effective alternative, though it requires proper installation to manage potential bowing.
Preventing Bowing: Proper rail placement, including a middle rail on six-foot fences, is the primary defense against bowing rails and pickets.
Cap Rails: A cap rail installed along the top of the fence adds significant rigidity, preventing sagging and providing a finished look.
"Good Side Out": Most communities in New Hampshire, Massachusetts, and Maine require the finished side of the fence (the pickets) to face outward. This means rails are installed on the interior, which also improves security by removing climbing holds.
Even the best-built fences may need attention over time. Professional maintenance can extend your fence's life, and you can find more info on fence repair services on our website.
Frequently Asked Questions about Wood Fence Rail Installation
Here are answers to common questions we receive about installing wood fence rails.
How do you prevent wood fence rails from sagging over time?
Preventing sagging comes down to professional installation techniques:
Proper Post Spacing: Keeping post spans to a maximum of 7 feet, 10 inches prevents rails from bowing under their own weight.
Correct Number of Rails: Using one rail per 24 inches of fence height (e.g., three rails for a six-foot fence) provides necessary support.
Quality Lumber: Selecting straight, high-quality lumber like cedar, which naturally resists bowing, is crucial.
Secure Fastening: Using appropriate screws or nails and pre-drilling pilot holes ensures a strong, lasting connection.
Adding a Cap Rail: A 2x4 cap rail along the top of the fence adds significant rigidity and prevents the entire structure from sagging.
What is the best way to join two rails on a post?
The strongest and most professional method is to butt the ends of two rails together at the exact center of a fence post. This maximizes the surface area for fastening. To further improve strength, we stagger the joints of the top, middle, and bottom rails across different posts. This distributes stress along the fence line and eliminates potential weak points, resulting in a structure that remains strong for decades.
Should fence rails be installed on the inside or outside of the posts?
For privacy and security fences, rails are almost always installed on the interior (private side) of the posts. There are three main reasons for this:
Aesthetics & Local Codes: Most local building codes require the "good side" (the smooth picket face) to face outward toward the public.
Security: Interior rails eliminate handholds, making the fence difficult to climb from the outside.
Privacy: Attaching pickets to the outside of the rails allows them to be placed tightly together, creating a solid privacy screen.
For most residential fences, interior rails are the professional standard.
Conclusion
As we've explored, properly installing wood fence rails is the foundation of a fence that will last for decades. It's a process where precision and professional technique make all the difference. Details like centering rail joints, staggering connections, maintaining ground clearance, and correctly handling slopes are what separate a temporary fix from a long-term investment in your property.
What makes professional installation so valuable is the understanding of how these elements work together in the real world—from dealing with New England weather to navigating local building codes in towns like Exeter, NH, or Haverhill, MA. The expertise required to execute these techniques flawlessly on varied terrain is what ensures a beautiful and durable result.
At Brentwood Fence LLC, we apply these principles to every project. We've seen how a well-built fence adds value, security, and privacy to a home. Whether you're in Derry, Dover, or anywhere across New Hampshire, Massachusetts, and Maine, we are ready to bring our professional touch to your property. The rails we install today become the backbone of a fence you can rely on for years to come.

 at top middle and bottom positions, vertical pickets attached to rails, fence bay spanning between posts, and grade line showing proper ground clearance - installing wood fence rails infographic")