Blog Content
12
Sep
2025

Learning how to install wood fence panels properly requires understanding that this project is both labor-intensive and precision-focused. While pre-assembled panels can make the process faster than building from scratch, successful installation still demands careful planning, proper tools, and technical expertise.
Quick Answer: Wood Fence Panel Installation Process
The research shows that installing fence panels is "a solid Saturday of work for a small number of panels (4-6)" but can take much longer for larger projects. Professional installers bring the experience to handle challenges like uneven terrain, proper post spacing, and ensuring panels remain level across your entire fence line.
Why homeowners choose professional fence installation:
The average cost of professionally installed wood fences ranges from $16 to $40 per foot, but this investment ensures your fence will stand straight and strong for years to come.

Easy how to install wood fence panels word list:
Think of planning your fence installation like planning a vacation – you wouldn't just show up at the airport without knowing where you're going, right? The same goes for how to install wood fence panels. Every successful fence project starts with thorough planning, and honestly, this is where many DIY projects go sideways.
We always start by chatting with homeowners about what they really want from their fence. Are you looking for privacy from nosy neighbors? Keeping your dog from making surprise visits to the street? Or maybe you just want to add some curb appeal? Understanding your goals helps us recommend the right approach and materials.
Here's where things get a bit more serious (but don't worry, we handle the boring stuff). Property lines are absolutely crucial – you'd be amazed how many neighbor disputes start with a fence that's three inches too far to the left. We always recommend setting posts about 4 inches inside your property line, just to be safe.
Then there's the paperwork side of things. Local building codes, zoning regulations, and those pesky HOA rules can feel like reading a foreign language. Some areas limit fence height, others have specific requirements about materials or colors. It's not exactly thrilling reading, but getting it wrong can mean tearing down and starting over.
Once we've mapped out the project scope – how many linear feet, where the gates go, and any tricky spots in your yard – we can give you a realistic timeline and budget. For detailed cost information, check out our guide on the Cost of Breaking Down Wood Fence Installation Costs Without Breaking the BankWood Fence Installation NH, MA, ME. And if you want the full scoop on our process, our Professional Fence Installation 101 covers everything.

Choosing the right materials is like picking the right shoes for a long hike – get it wrong, and you'll regret it later. Most wood fence panels come in standard 6 x 8 foot sizes, which makes planning much easier.
When it comes to wood types, you've got two main contenders. Pressure-treated lumber is the practical choice – it's been chemically treated to fight off rot, bugs, and decay. Yes, it might look a bit green at first (think of it as a temporary tan), but that fades quickly. It's budget-friendly and tough as nails.
Cedar fencing is the premium option, and honestly, it's gorgeous. It smells amazing, naturally resists insects, and has that rich, warm color that makes your neighbors jealous. It costs more upfront, but many homeowners think it's worth every penny for the natural beauty.
Now, here's where things get interesting – metal posts vs wood posts. Traditional wood posts work great, but steel posts wrapped in wood sleeves are practically indestructible. They won't rot, won't shift, and basically last forever. If you're curious about this option, we've got a detailed guide on Installing Wood Fence Panel with Metal Posts.
Don't forget about fence hardware – those screws, brackets, and fasteners might seem minor, but cheap hardware will rust and fail. We only use exterior-grade galvanized or stainless steel fasteners. Trust us, spending a few extra dollars here saves headaches later.
The cost per linear foot varies quite a bit depending on your choices, terrain, and local labor rates. But we'll give you a detailed, transparent estimate so there are no surprises.
Before we dig a single hole, there's one non-negotiable step: calling 811. This isn't just a suggestion – it's the law in most places, and more importantly, it keeps everyone safe. Underground utilities are everywhere, and hitting a gas line or electrical cable can turn your fence project into a very expensive (and dangerous) nightmare. CALL DIG SAFE provides all the details about this essential service.
Once utility companies have marked utility lines with their colorful spray paint (it looks like a rainbow exploded in your yard, but it's temporary), we can start the fun part – establishing the fence line.
This is where precision really matters. We use stakes and string to create a perfectly straight guideline. Think of it as drawing with a ruler before writing in pen. Corner posts go in first since they anchor everything, then we mark the line posts along the string.
For standard 8-foot panels, we space posts exactly 8 feet apart. This might seem obvious, but you'd be surprised how easy it is to get measurements wrong when you're measuring post spacing across a large yard. A small error at the beginning compounds as you go, and suddenly your last panel doesn't fit.
Getting this layout phase right is what separates a professional-looking fence from one that makes people tilt their heads and ask, "Is that supposed to be crooked?"
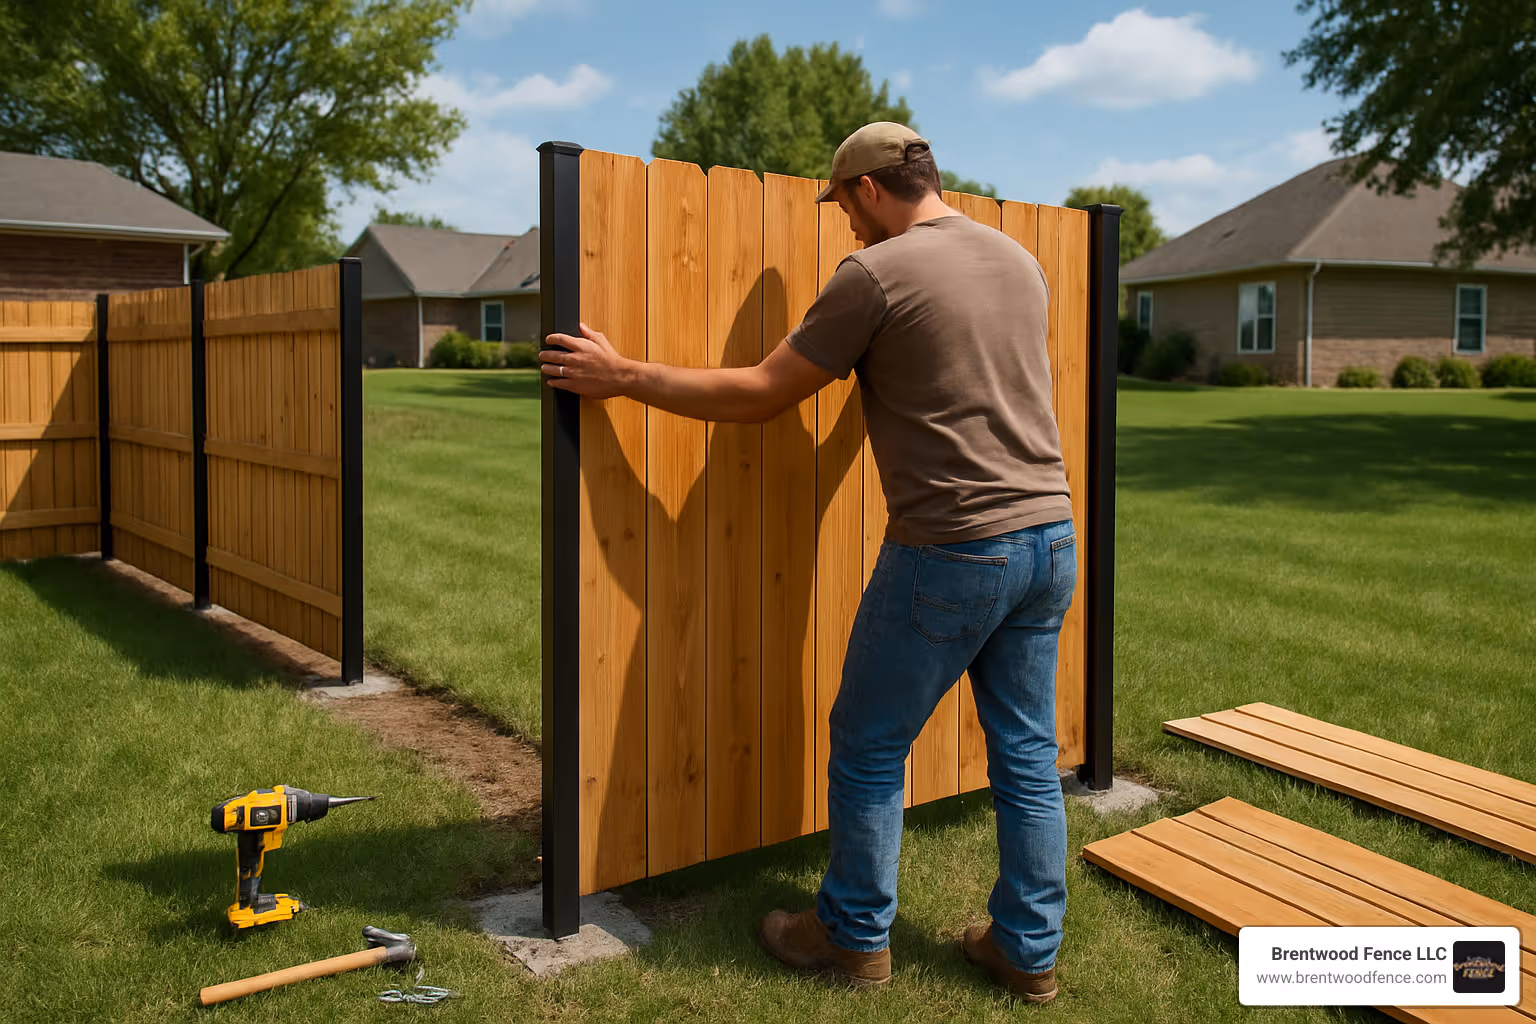
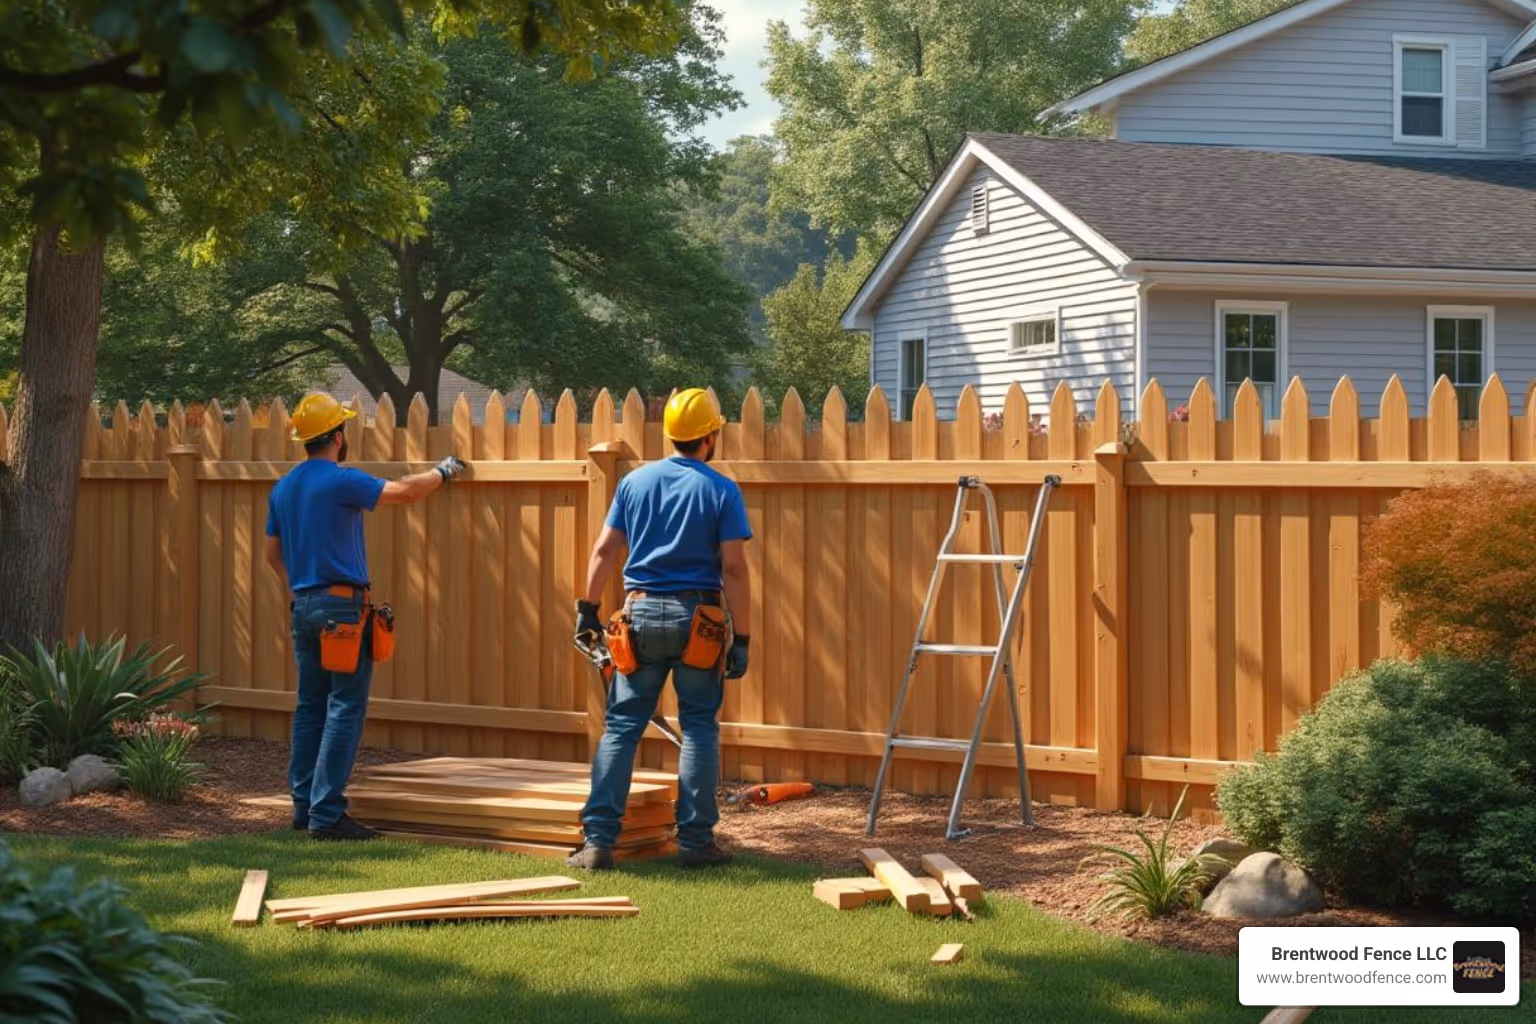
When you watch a professional team tackle how to install wood fence panels, you'll quickly understand why this isn't a casual weekend project. The installation phase transforms all that careful planning into a beautiful, sturdy fence that will improve your property for decades to come.
This is where the real work begins – and it's genuinely labor-intensive. Each panel weighs between 40-60 pounds, concrete needs to be mixed and poured precisely, and every measurement must be spot-on. One misaligned post can throw off your entire fence line, creating gaps that look unprofessional and compromise the fence's stability.

The importance of precision can't be overstated. A fence that's even slightly off-level will be noticeable from across the yard, and fixing mistakes after concrete has cured is both expensive and time-consuming. That's why professional wood fence installers follow a detailed plan and work as a coordinated team – one person might hold a panel steady while another checks for level, and a third secures it with screws.
Teamwork really shines during panel installation. These aren't lightweight garden stakes we're talking about. Maneuvering an 8-foot panel into perfect position between posts requires coordination, especially when dealing with wind or uneven ground.
Setting fence posts correctly separates a fence that lasts 20+ years from one that starts leaning after the first winter. This is universally considered the hardest part of fence installation, and there's no shortcut that doesn't compromise quality.
The process starts with digging post holes, which is where many DIY projects stall out. While homeowners might rent a manual post hole digger, professional crews use power augers that can punch through roots, clay, and rocky soil with efficiency that saves hours of backbreaking work.
Hole depth and diameter matter enormously for fence stability. For a standard 6-foot fence, we dig holes 36 inches deep – that's one-third of the total post length underground. The holes need to be 6 to 8 inches in diameter to accommodate concrete and allow proper drainage.
In New England's challenging climate, frost line considerations are crucial. The ground can freeze 36 to 48 inches deep during harsh winters, and any post not set below this line risks being pushed out of alignment by frost heave. We've seen beautiful fences ruined by this oversight.
Before setting any post, we add about 3 inches of gravel for drainage at the bottom of each hole. This simple step prevents water from pooling around the wood and dramatically extends the post's lifespan by reducing rot.
Mixing concrete properly makes all the difference in post stability. Rather than the dry-pour method some DIYers attempt, we thoroughly mix concrete before pouring to ensure consistent strength throughout the footing. Each post gets carefully positioned and checked with levels on multiple sides to ensure it's perfectly plumb.
Bracing posts while concrete cures prevents any shifting that would throw off panel alignment. We typically use temporary wooden braces screwed to the posts, creating a rigid triangle that holds everything steady.
Curing time requires patience. Quick-setting concrete hardens in 20-40 minutes, but we wait 24 hours before hanging panels. This full cure ensures maximum strength and prevents any settling that could create alignment issues later.
Once posts are rock-solid, the fence really starts taking shape as we attach the pre-assembled panels. This phase requires careful lifting panels – definitely a two-person job given their size and weight.
Temporary supports are essential for achieving professional results. We typically screw 2x4 supports to the posts, using a line level to ensure their top edges are perfectly aligned. This creates a stable platform that holds each panel at exactly the right height and level.
Attaching panels to posts requires the right fasteners and technique. We use exterior-grade screws – typically 3-inch galvanized screws that won't rust over time. Each panel gets multiple screws per side, driven straight and evenly spaced for maximum holding power.
Fence brackets offer an alternative attachment method that some homeowners prefer for their clean appearance. These metal brackets bolt to the post and cradle the panel's horizontal rails, creating a strong connection that's easy to service if repairs are ever needed.
Ensuring panels are level across the entire fence line requires constant checking and adjustment. Even small variations become obvious once the fence is complete, so we take time to get each panel perfectly positioned.
Maintaining a consistent gap from the ground – typically 2 inches – prevents moisture damage and makes yard maintenance much easier. You'll appreciate this gap when mowing or trimming around the fence base.
Sloped yards present unique challenges that separate professional installations from amateur attempts. The difference between a fence that looks custom-built for your landscape and one that appears awkward or poorly planned often comes down to slope management techniques.
The stepping method involves installing panels in horizontal steps, with each panel sitting slightly lower than the previous one. While this works with pre-assembled panels, it can create noticeable gaps under the fence and a choppy appearance on steeper slopes.
Racking panels creates a much more neat solution. The panels are angled to follow the ground's slope, keeping top and bottom rails parallel to the grade. This maintains consistent spacing under the fence and creates a natural flow that complements your landscape.
Maintaining a level top line versus following the ground contour depends on your preference and the terrain. A level top line looks formal and structured, while following the contour appears more organic and natural.
Following ground contour requires expertise in reading the landscape and understanding how the fence will look from different angles. What seems like a good idea on paper might create awkward sight lines in practice.
Custom-built sections vs pre-made panels on slopes often determines the final result's quality. While pre-assembled panels work well on level ground, sloped installations frequently require custom building with individual pickets and rails to achieve proper angles and spacing.
For homeowners across New Hampshire, Massachusetts, and Maine dealing with challenging terrain, our Expert Fence Install Near You Guide provides detailed insights into handling these complex installations professionally.
Once your wood fence panels are securely in place, the magic really happens in those final touches that transform a basic barrier into something truly special. These finishing steps don't just make your fence look amazing – they're what keep it standing strong and beautiful for decades to come.

Think of this stage like putting the cherry on top of a sundae. The ice cream tastes good without it, but that little extra touch makes all the difference. The same goes for post caps that protect your fence posts from rain and snow, preventing water from seeping into the wood grain and causing rot from the inside out.
Gate hardware installation requires special attention because gates get used constantly – kids swinging on them, delivery drivers pushing through them, and that inevitable moment when someone tries to close it while carrying too many grocery bags. This daily wear and tear means every hinge and latch needs to be perfectly positioned and rock-solid.
Wood protection becomes your fence's best friend against Mother Nature's mood swings. Whether it's the scorching summer sun trying to fade your beautiful wood or winter storms testing every joint and connection, the right protective finish acts like sunscreen and a raincoat rolled into one.
Annual maintenance might sound like a chore, but it's really just a yearly check-up that keeps small problems from becoming big headaches. A loose screw here, a touch-up stain there, and your fence stays looking like it was just installed yesterday.
Installing a gate properly is like building the front door to your backyard – it needs to work perfectly every single time while looking great and keeping your family secure. We've learned that gate installation separates the pros from the weekend warriors faster than almost anything else in fencing.
Gate post reinforcement starts before we even think about hanging the gate itself. These posts carry way more weight and stress than regular fence posts, so we dig deeper holes and use more concrete. Think of them as the strongmen of your fence line – they need extra muscle to handle a gate that might weigh 50 pounds or more, plus all that swinging action over the years.
Gate kits make the hardware side much easier, but the real skill comes in getting everything aligned perfectly. We measure the gate opening to be exactly 1-1/4 inches wider than the gate itself – that gives us 5/8 inch clearance on each side for smooth operation without binding.
Hinge and latch placement requires precision that would make a watchmaker proud. The hinges need to be perfectly vertical and spaced correctly to prevent sagging. We install hinges with pins pointing up and down, which not only works better but also makes it much harder for someone to remove them from the outside.
Ensuring proper swing and alignment means checking that the gate opens and closes smoothly without scraping the ground or binding against the posts. A gate that fights you every time defeats the whole purpose of having convenient access to your yard.
Preventing gate sag is all about that initial installation quality. When everything is measured precisely and installed with the right hardware, your gate will swing smoothly for years. For more details about our gate installation process, check out our FAQ Fence Installation Service NH, MA, ME.
Your beautiful new fence is like a fine piece of furniture sitting outside 24/7, facing everything from blazing sun to driving rain to freezing snow. Without proper protection, even the best wood will start showing its age within just a few seasons.
Allowing treated wood to dry is probably the hardest part for excited homeowners – you want to stain that fence right away! But patience pays off here. Pressure-treated lumber comes loaded with moisture and chemicals, and trying to stain wet wood is like trying to paint over a wet surface. The stain simply won't penetrate properly, leading to peeling and poor protection down the road.
Staining vs. painting each has its place, though most homeowners prefer staining for wood fences. Wood sealer penetrates deep into the grain, enhancing the natural beauty while providing excellent protection against moisture and UV rays. It won't peel or crack like paint can, making future maintenance much easier. Paint offers the ultimate protection but requires more upkeep and can hide the wood's natural character.
Safety with pressure-treated wood means wearing a dust mask and eye protection when cutting, and washing hands thoroughly afterward. Never burn treated lumber or use it as mulch in your garden. For detailed information about wood preservative chemicals, you can read more about pressure treated lumber on the EPA website.
Annual cleaning with a soft brush and mild detergent keeps your fence looking fresh and helps you spot any potential problems early. Regular inspections for loose fasteners or damaged pickets let you fix small issues before they become big repairs. Reapplication of finish every 2-5 years depending on your climate keeps the protection strong. Vegetation control means keeping bushes and vines from growing against the fence, which traps moisture and blocks air circulation. Finally, snow removal in our New England winters prevents prolonged moisture exposure that can lead to rot.
Taking care of your fence isn't complicated, but it makes an enormous difference in how long it lasts and how good it looks. Think of it as a small investment that protects a much larger one.
When homeowners contact us about how to install wood fence panels, we hear the same questions time and again. These are the most common concerns that come up during our consultations, and we're happy to share our professional insights to help you make informed decisions about your fencing project.
Absolutely not – this is one of the most important details that separates amateur installations from professional work. Wood fence panels should be installed at least two inches above the ground to prevent moisture absorption and the rot that inevitably follows. When wood pickets sit directly on soil or grass, they act like sponges, drawing up moisture that leads to decay, warping, and premature failure of your investment.
This gap serves multiple purposes beyond preventing rot. It allows for proper air circulation underneath the fence, which helps the wood stay dry and healthy. You'll also find that landscaping becomes much easier when there's clearance for your mower and string trimmer – no more worrying about accidentally damaging your fence during routine yard maintenance.
This question gets to the heart of fence stability, and the answer follows a simple but crucial rule: one-third of the post's length should be underground. For a standard 6-foot high fence, we use 10-foot posts and dig holes 36 inches deep. This isn't just a suggestion – it's essential for creating a fence that will stand straight and strong for decades.
Here in New Hampshire, Massachusetts, and Maine, we face an additional challenge that warmer climates don't have to worry about. Our holes must reach below the local frost line, which can extend 36 to 48 inches deep depending on your exact location. Frost heave is a real phenomenon that can literally push poorly set posts right out of the ground over winter cycles.
The hole diameter matters just as much as depth. We dig holes 6 to 8 inches wide – roughly three times the width of the post. This provides adequate space for the concrete that will lock your posts in place permanently.
The concrete timeline is where patience pays off in the long run. Quick-setting concrete hardens in about 20 to 40 minutes, which means you can move around the work area without disturbing the posts. However, hardening and full curing are two different things entirely.
For maximum strength and stability – especially when we're attaching heavy wood panels – we always wait 10 to 24 hours for complete curing. Temperature and humidity affect this timeline, so we adjust our schedule accordingly. Rushing this step is one of the biggest mistakes we see in DIY installations, leading to posts that shift or lean once the full weight of the fence is attached.
Our professional teams plan projects with proper curing time built into the schedule. It's this attention to detail that ensures your fence will look as good in ten years as it does on installation day.
Installing how to install wood fence panels properly transforms your backyard into a private sanctuary while boosting your home's value and curb appeal. What might look like a simple weekend project actually involves countless details that separate a wobbly DIY attempt from a fence that stands straight and strong for decades.
The difference between success and frustration often comes down to experience. Professional installers know how to read the subtle signs in your soil, steer the maze of local building codes, and handle those tricky slopes that can turn a straightforward project into a headache. Whether it's digging below the frost line in Manchester NH or ensuring proper drainage in the coastal areas of Portsmouth NH, our team brings years of knowledge to every project.
The investment in professional installation pays dividends through durability, precision, and peace of mind. You won't find yourself wrestling with sagging gates, crooked panels, or posts that shift with every freeze-thaw cycle. Instead, you'll have a fence that improves your property and serves your family reliably year after year.
Your time is valuable, and fence installation is genuinely hard work. From mixing concrete in all weather to wrestling heavy panels into perfect alignment, this isn't a project most homeowners tackle twice. When you choose professional installation, you're choosing expertise, proper tools, and a team that takes pride in creating something built to last.
For a perfect fence without the hassle, trust the experts at Brentwood Fence LLC. We understand the unique challenges of New England weather and terrain, and we're committed to delivering results that exceed your expectations.
Get a free estimate for your professional wood fencing installation services and let us help you create the beautiful, functional outdoor space your family deserves.

Copyright 2022 Brentwood Fence | All Rights Reserved | Sitemap | Website by Plumb Development a Digital Marketing Agency