Blog Content
9
Jul
2025
Putting concrete in vinyl fence posts is absolutely essential for a fence that stays straight, strong, and stable for decades. Here's what you need to know:
Quick Answer:
As one N.H. professional fence contractor put it: "Fences that last for decades have two things in common: they are made from high-quality materials and they have a good foundation."
Why concrete matters: Vinyl fence posts are hollow and too large to drive into the ground. Without concrete, they'll shift, lean, and potentially void your warranty. Vinyl fence posts installed with concrete can last for decades, with many manufacturers offering lifetime warranties only when posts are properly set in concrete.
Professional vs. DIY: While homeowners can tackle this project, getting the hole depth, concrete mix, and post alignment right requires precision. One mistake with the concrete cure time or post level can mean starting over.
The good news? Whether you hire professionals or go the DIY route, the process is straightforward when you follow the right steps.

Putting concrete in vinyl fence posts terms at a glance:
The short answer is an emphatic yes. Unlike lightweight chain link fences, putting concrete in vinyl fence posts isn't optional—it's absolutely essential.
Vinyl fence posts are hollow by design, making them lightweight but unable to anchor themselves in soil. You can't drive them into the ground like a steel post, and they're too large to wedge into a narrow hole.
Wind load is the real killer. Those beautiful privacy fences are basically giant sails waiting for the next storm. Without concrete anchoring your posts, even moderate wind can turn your fence into expensive debris scattered across your yard.
Soil conditions make things trickier. Whether you're dealing with sandy soil that shifts, clay that expands and contracts, or rocky terrain that never settles consistently, concrete provides the rock-solid foundation that soil simply can't match.
Freeze-thaw cycles are particularly brutal on fence posts, especially in New England. When water freezes in soil around your posts, it expands with incredible force. Without concrete extending below the frost line, those cycles can literally push your posts out of the ground.
Strength and stability resist both sideways wind push and up-and-down frost forces. This is especially critical for gate posts, which get constant stress every time someone opens and closes the gate.
Perfect alignment becomes possible when you use concrete. You can set your posts perfectly plumb and straight, then hold them in that exact position while the concrete cures.
Longevity is where concrete really shines. Professional installers report that properly set concrete footings can last 50+ years without issues. That initial investment in concrete pays dividends in fence lifespan spanning decades.
Leaning posts are the most common result of skipping concrete. Posts start leaning gradually, creating an unsightly fence line that's expensive to fix.
Wind failure can be catastrophic. We've seen entire fence sections blown over in storms when posts weren't properly anchored. What starts as a money-saving shortcut ends up costing far more in replacement and repair.
Voided warranty is the final nail in the coffin. Most vinyl fence manufacturers require concrete installation to maintain warranty coverage. Skip the concrete, and you're on your own if problems arise.
Getting your materials and tools organized before you start putting concrete in vinyl fence posts will save you hours of frustration and multiple trips to the hardware store.
Start with the layout. You'll need wooden stakes and mason's string to mark your fence line, plus a measuring tape. Spray paint helps you see exactly where each post goes. Most importantly: call 811 for utility location. It's free, required by law, and could save your life.
For digging, a manual post hole digger works for small projects, but if you're installing more than a few posts, rent a gas-powered auger. Keep a shovel handy for cleanup and a wheelbarrow for moving materials.
Material-wise, you'll need 3/4-inch crushed stone for drainage (about 6 inches per hole), plus 60-pound bags of Quikrete concrete mix. Don't forget temporary post braces - simple 2x4 lumber keeps posts straight while concrete cures.
Safety first means safety glasses, work gloves, steel-toed boots, and hearing protection if using power tools.
For homeowners who want professional installation, our Vinyl Fencing Installation Services ensure everything gets done right the first time.
Getting the hole depth right is crucial. The standard rule is one-third of your post height plus 6 inches. So for a typical 6-foot fence, you're looking at 30 inches deep. In New England, frost concerns mean going deeper - usually 42 to 48 inches to get below the frost line.
Hole diameter depends on your post size. Standard 4x4 posts need holes that are 9 to 12 inches across. Gate posts need 12 to 15 inches of diameter to stay rock-solid.
For concrete volume, plan on 1 to 2 bags of 60-pound Quikrete per standard post hole. Gate posts might need 2 to 3 bags. Always buy an extra bag or two - running out of concrete halfway through is a nightmare scenario.
The digging decision comes down to how many posts you're installing. One to three posts? A manual post hole digger is doable. More than that, and renting a gas-powered auger becomes a no-brainer.
For mixing concrete, you'll need either a wheelbarrow or mixing tub, plus a hoe or mixing paddle. A garden hose with spray nozzle gives you control over water flow.
Measuring tools are non-negotiable - get at least a 4-foot level, string line with stakes, and a measuring tape. Getting posts perfectly plumb separates amateur-looking fences from professional results.
There are some tools you will need… for a complete toolkit, but starting with these basics will handle most residential fence projects.

Here's where the rubber meets the road - putting concrete in vinyl fence posts properly. This determines whether your fence will stand strong for decades or start leaning within the first year.
The key to success is patience and precision. You're creating a foundation that needs to last, so resist the urge to rush through any steps.
Call 811 before you dig a single hole. This free service locates underground utilities and could save you from a very expensive mistake.
Mark your fence line carefully using stakes and string. Take time to measure the spacing between posts - typically 6 to 8 feet depending on your panel size.
Dig each hole 30 inches deep and keep the sides as straight as possible. If you're in an area with harsh winters, go deeper to get below the frost line. The hole should be 9 to 12 inches in diameter.
Add your gravel base - about 6 inches of crushed stone at the bottom of each hole. The gravel improves drainage and gives your post a stable foundation. Tamp it down firmly.
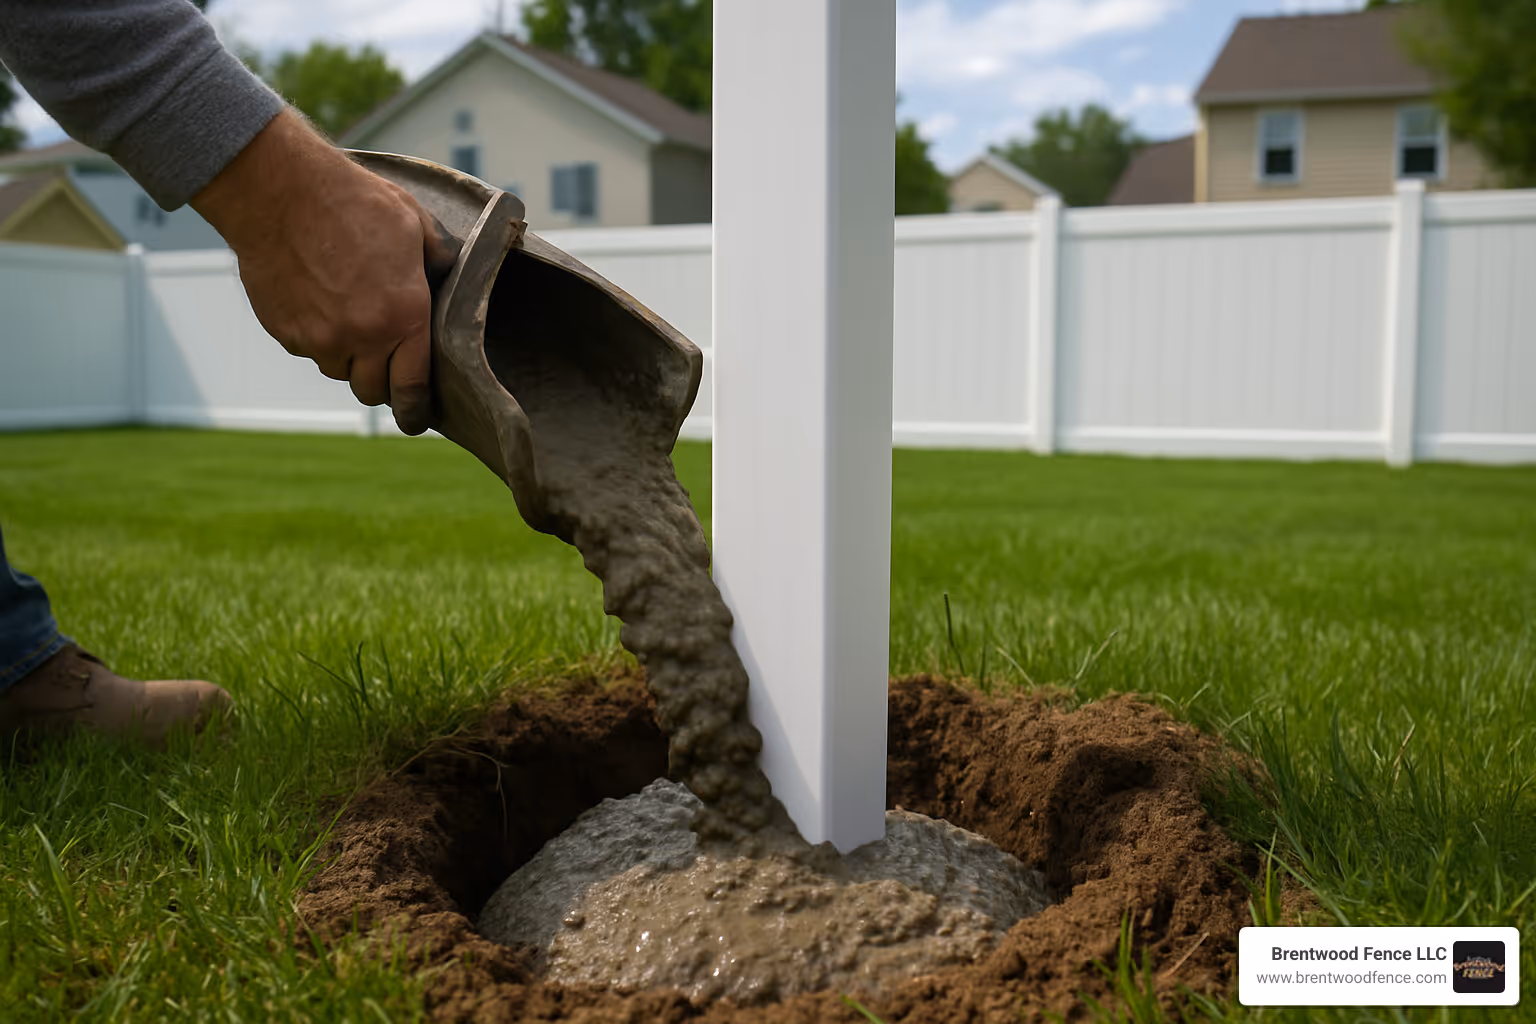
You have two solid options for putting concrete in vinyl fence posts: wet mix or dry mix.
Wet mixing means combining the concrete with water in a wheelbarrow first, then pouring it around the post. This gives you immediate stability and works great when it's windy. The downside? It's more work and you need to move fast once it's mixed.
Dry mixing is simpler - pour the dry concrete mix directly into the hole around the post, then add water gradually while mixing with a stick. This method is perfect for single-person installations and less stressful for beginners.
Fast-setting concrete like Quickcrete Dry Mix Post Setting can set in 20 to 40 minutes. This is fantastic for gate posts or when you need to work quickly.
Whatever method you choose, don't over-water the mix. Too much water actually weakens the concrete. Follow the package directions exactly.
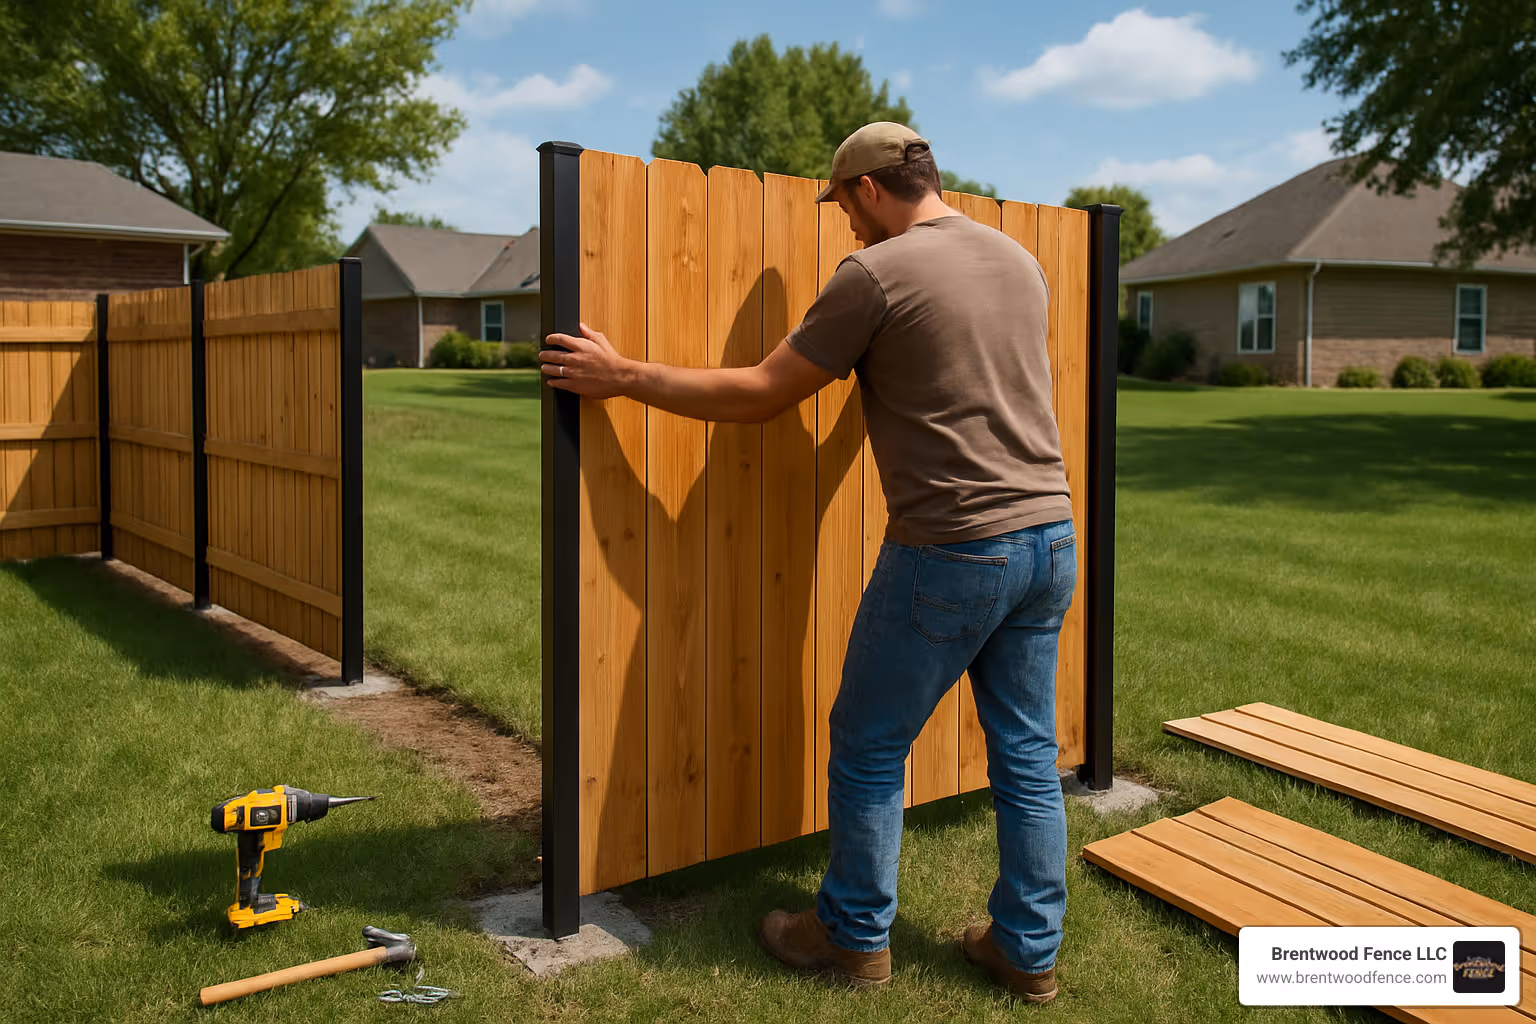
Getting the post perfectly plumb is absolutely critical. Use a 4-foot level to check that the post is vertical in both directions. Even a slight lean will throw your entire fence line out of alignment.
Run a string line between your corner posts to ensure all intermediate posts align perfectly. Check this alignment before the concrete starts to set.
Brace each post with temporary 2x4 supports while the concrete cures. Secure these braces to stakes driven into the ground. A properly braced post stays exactly where you put it.
Shape the concrete surface so it slopes away from the post. This prevents water from pooling around the base and extends the life of your installation.
Leave 2 to 3 inches of space at the top of the hole for soil backfill after the concrete cures.
Wait 24 to 48 hours before removing braces or installing fence panels. Fast-setting mixes might be ready in 4 to 6 hours, but don't rush it. Concrete continues to strengthen over time.
Weather matters when working with concrete. Avoid pouring in temperatures below 40°F or above 90°F. Light rain is manageable, but heavy rain can wash out your mix.
While putting concrete in vinyl fence posts is the gold standard, life sometimes throws you curveballs. Maybe you're dealing with rocky soil that's impossible to dig, or you need to install a fence on an existing concrete patio.
No-dig systems use metal posts with specialized anchors that expand underground to grip the soil.
Here's the reality: no-dig systems work great in hard clay soil where the anchors can really bite in and hold tight. But in sandy or rocky soil? You're setting yourself up for disappointment.
Speed is the biggest advantage of no-dig systems. You can install a fence section in the time it takes concrete to cure. Plus, if you might move the fence later, no-dig systems are completely removable.
The downsides are significant though. Most vinyl fence manufacturers won't honor their warranty if you skip concrete. Wind resistance is also much lower - we've seen no-dig fences fail in storms that wouldn't budge a properly concreted fence.

Bottom line: If you have perfect clay soil and you're installing a short decorative fence, no-dig might work. For everything else - especially gates or privacy fences - concrete is still your best bet.
Structural foam sets in about 3 minutes and expands to fill the hole completely. It's lightweight, easy to work with, and perfect when you need to finish quickly.
The cost will make you wince though. Foam costs roughly three times more than concrete per post. For a small repair job, that's manageable. For a whole fence line? Your wallet will feel it.
Performance-wise, foam works well for standard fence posts in typical conditions. But never use foam for gate posts. Gates create constant stress that foam simply can't handle long-term.
Sometimes you inherit a concrete patio and need to add fencing. Don't panic - it's totally doable, but it requires a different approach.
Core drilling is your friend here. You'll need to drill holes 4-6 inches deep into the existing concrete using a hammer drill with a masonry bit.
Hydraulic cement is the secret weapon for this installation. This fast-setting cement grabs onto rebar anchors and sets in about 10 minutes. Once cured, it's incredibly strong.
The process is straightforward: Mark your post locations precisely, drill the holes, insert rebar anchors with hydraulic cement, then slide your vinyl posts over the rebar. Fill the posts with concrete mix to add weight and stability.
For detailed guidance on this specialized installation, check out Installing Vinyl Fencing on Concrete.
After years of installing vinyl fences across New Hampshire and Massachusetts, we've seen the same mistakes pop up repeatedly. Most fence failures are completely preventable when you know what to watch for.
The biggest mistake is skimping on hole depth. It's tempting to stop digging at 24 inches and call it "close enough," but shallow posts will fail. That one-third rule isn't a suggestion - it's the difference between a fence that lasts decades and one that starts leaning after the first storm.
Skipping the gravel base is another classic error. Adding 6 inches of crushed stone feels like extra work, but that gravel layer prevents water from pooling around your post base, which leads to frost heave and concrete failure.
Over-watering the concrete mix actually weakens it significantly. More water doesn't make concrete stronger - it makes it weaker. Follow the package directions exactly.
Ignoring the frost line is costly in New England. We've seen beautiful fences literally pushed out of the ground during freeze-thaw cycles because the concrete didn't extend below the frost line. In our area, that means going 42-48 inches deep.
For more professional insights, check out our Blog: Professional Fence Installation 101.
Water is your fence's worst enemy. When water pools around fence posts and freezes, it expands with tremendous force - enough to crack concrete and push posts out of alignment.
The crushed stone base creates a drainage reservoir that prevents water from sitting against the post base. Think of it as a French drain for your fence posts.
Crowned concrete is equally important. When finishing the concrete surface, shape it to slope away from the post in all directions. This channels water away from the post and prevents freeze-thaw damage.
The string line method is your best friend for maintaining perfect alignment. Run a taut string between your corner posts at the desired height, then align all intermediate posts to that string.
Timing is everything when it comes to adjustments. Most concrete mixes give you about 20-30 minutes of working time before they start to set up. Check your level and alignment immediately after setting each post.
The key is being methodical. Rush the leveling process, and you'll end up with a fence that looks like it was installed during an earthquake.
Patience pays off when it comes to concrete cure time. Wait at least 24 hours before installing fence panels, and give gate posts a full 48 hours to cure properly.
Fast-setting concrete formulations might seem ready in just 4-6 hours, but "touchable" doesn't mean "ready for action." The concrete needs to reach sufficient strength to handle the weight and wind load of full fence panels.
Gate posts deserve extra respect because they'll endure constant stress from opening and closing. A wobbly gate is expensive to fix once the fence is complete.
Winter installation requires careful timing. Avoid putting concrete in vinyl fence posts when temperatures drop below 40°F. Cold weather dramatically slows concrete curing and can cause freeze damage.
If you must install during winter, use fast-setting concrete mix and protect your work from freezing for at least 24 hours.
Rain presents its own challenges. Light drizzle won't hurt your project, but heavy rain can wash out the concrete mix or dilute it beyond effectiveness. Keep an eye on the weather forecast and cover fresh concrete with plastic sheeting if storms threaten.
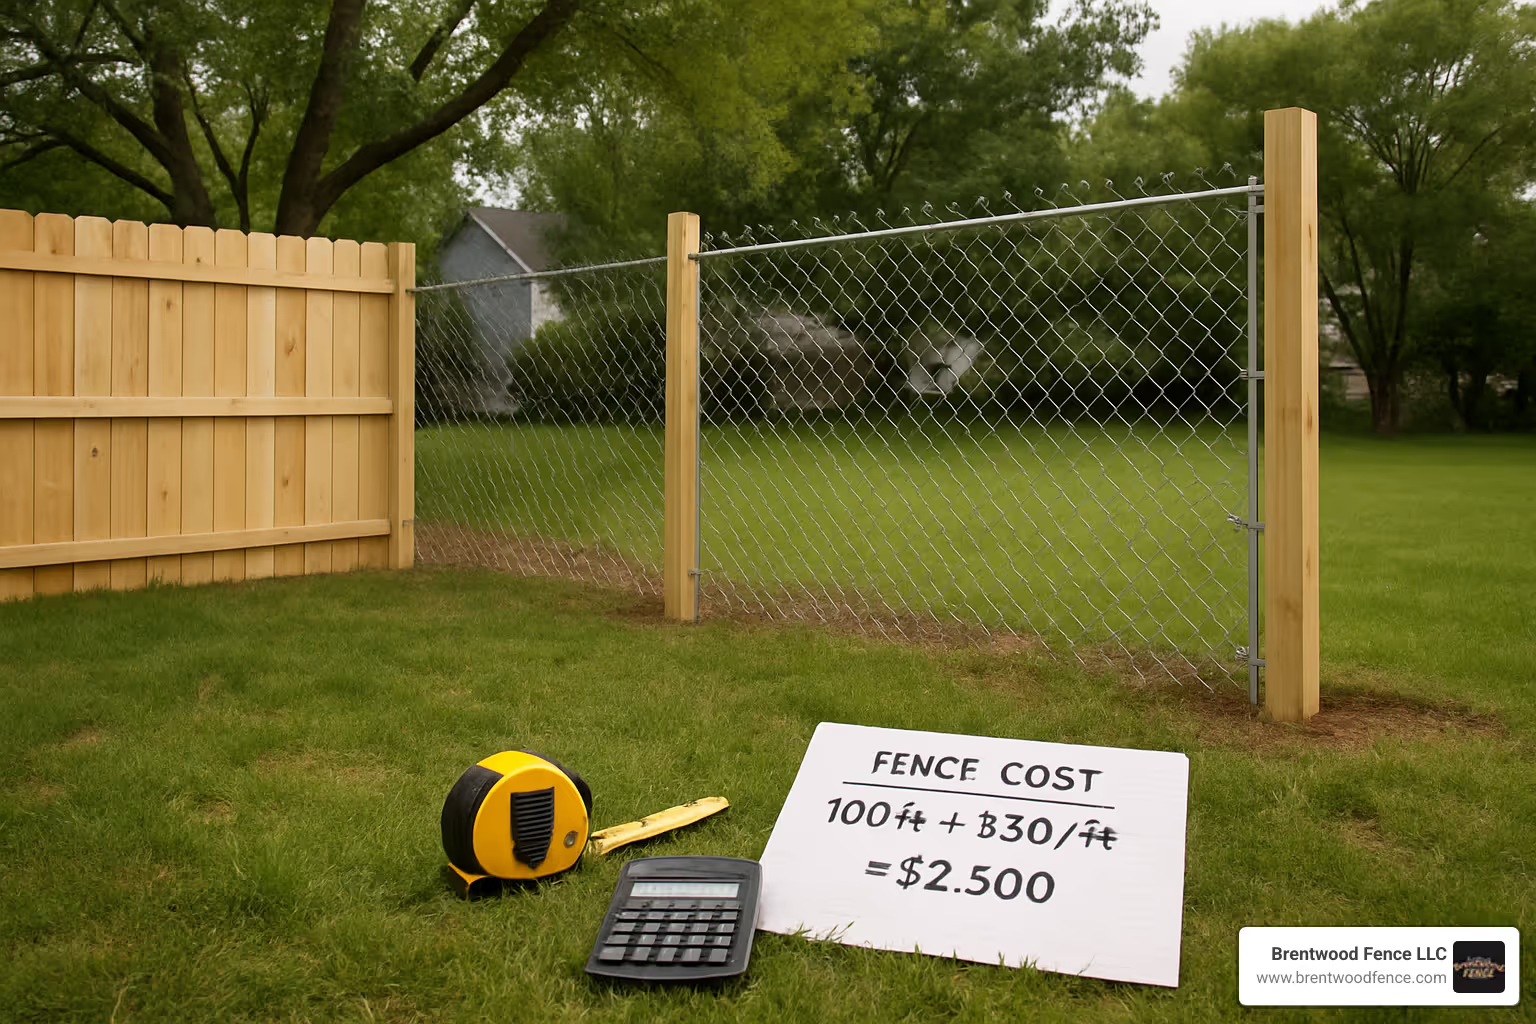
Standard fence posts typically need 1-2 bags of 60-pound Quikrete per post for 4x4 posts in 30-inch deep holes.
Gate posts are concrete-hungry because they need larger holes and must handle more stress. Plan on 2-3 bags per gate post to ensure adequate support.
The golden rule: Purchase 10-15% extra bags beyond your calculations. Running short in the middle of your project means one post doesn't get finished properly, and partially cured concrete doesn't wait for your hardware store run.
Putting concrete in vinyl fence posts isn't just a good idea - it's the foundation of a fence that will make your neighbors jealous for decades to come. The process comes down to a few critical elements that make all the difference. Proper hole depth of 30+ inches gives your posts the anchor they need. The right diameter of 9-12 inches provides enough concrete mass to keep everything stable. And that gravel base is your insurance policy against water damage and frost heave.
The 24-48 hour cure time tests everyone's patience, but it's worth every minute. A fence that's properly set in concrete can handle New England's worst weather - from howling nor'easters to the freeze-thaw cycles that make other fence types fail.
Remember to call 811 before you dig that first hole. It's free, required by law, and prevents expensive surprises that can turn a weekend project into a costly disaster.
Whether you're rolling up your sleeves for DIY or bringing in professionals, the fundamentals remain the same. Quality materials, proper technique, and attention to detail separate fences that last from fences that become expensive lessons.
A well-installed vinyl fence with proper concrete footings isn't just a boundary marker - it's a 30+ year investment in your property's value and your family's privacy. The upfront effort pays dividends every time you look out your window and see straight, sturdy posts that haven't budged an inch.
Ready to get started on your fence project? Contact us for a Free Fencing Installation Estimate. At Brentwood Fence LLC, we're your local experts for rock-solid vinyl fences throughout New Hampshire, Massachusetts, and Maine. We understand New England's unique challenges - from our notorious frost lines to the soil conditions that vary from town to town.

From the Seacoast to the Lakes Region, we've been installing vinyl fences the right way for years. Because when it comes to fence installation, there's no substitute for doing it right the first time. Your fence should be the last thing you worry about - and with proper concrete installation, it will be.

Copyright 2022 Brentwood Fence | All Rights Reserved | Sitemap | Website by Plumb Development a Digital Marketing Agency