Blog Content
19
Jul
2025

Putting in a vinyl fence is one of the most rewarding DIY projects you can tackle. Unlike wood fencing that rots and warps, vinyl delivers decades of maintenance-free beauty that can increase your property value by up to 5%.
Quick Overview: Essential Steps for Vinyl Fence Installation
The best part? Vinyl fences can last 20 to 30 years with minimal upkeep, and they're 5 times stronger than wood. With over 90% of vinyl fence owners reporting satisfaction after 5 years, it's clear why this material has become the go-to choice for homeowners.
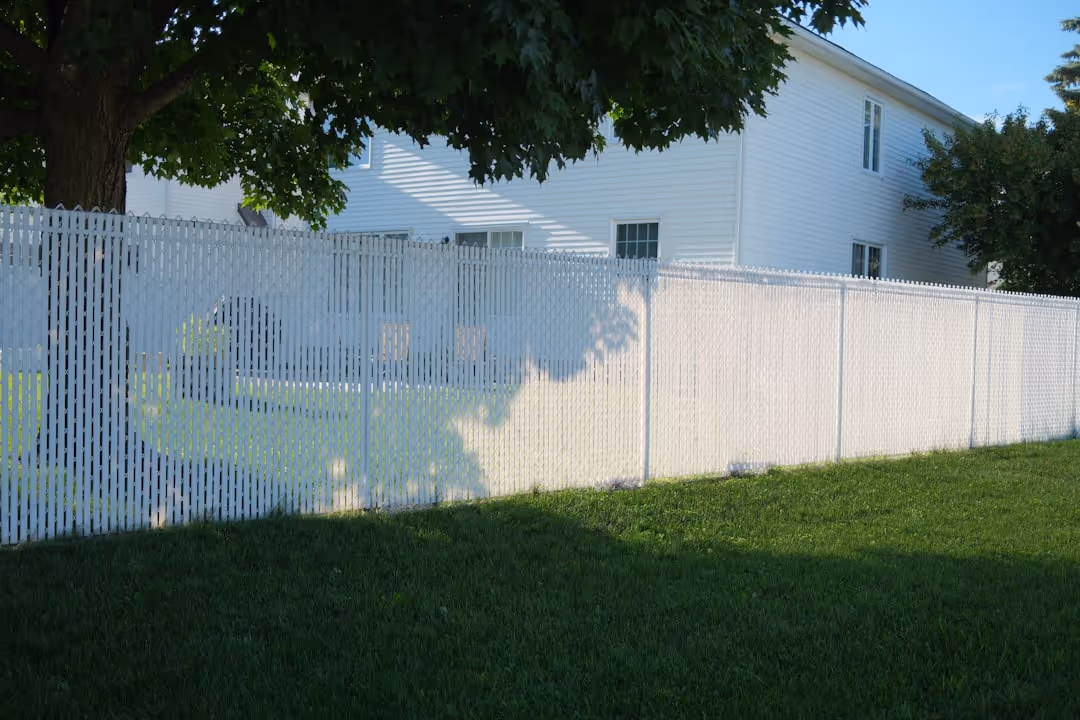
Modern vinyl systems snap together almost like building blocks, making installation surprisingly straightforward. You'll avoid the painting, staining, and constant repairs that wood demands. Plus, vinyl comes in over 10 colors and styles - from classic white privacy panels to decorative picket designs.
Whether you're containing pets, creating privacy, or boosting curb appeal, vinyl delivers professional results that weather New England's harsh seasons without fading or cracking.


Let's be honest - nobody wants to spend their weekends scraping paint off fence boards or replacing rotted posts. That's exactly why vinyl fencing has become the smart choice for homeowners who want beautiful results without the endless upkeep.
Putting in a vinyl fence means you're investing in a solution that's built to last. Vinyl fences are 5 times stronger than wood and can handle everything New England weather throws at them. Those brutal freeze-thaw cycles that destroy wood fencing? Vinyl just shrugs them off.
The durability story gets even better when you consider vinyl's impressive 20 to 30-year lifespan. While your neighbors are replacing their wood fences for the second time, you'll still be enjoying your original vinyl installation. The secret lies in vinyl's UV protection that prevents fading and its resistance to rot, warping, and insect damage.
Low-maintenance living is perhaps vinyl's biggest selling point. You'll spend 75% less time on fence care compared to wood. Annual cleaning with a garden hose is typically all you need - no staining, painting, or emergency repairs when boards start falling apart.
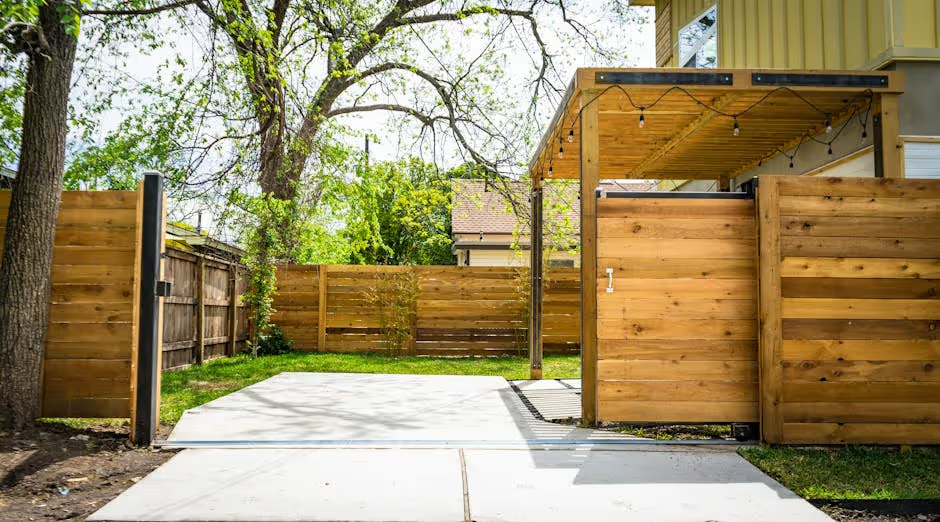
When it comes to styles, vinyl offers impressive variety. Privacy fencing remains the most popular choice, with solid panels that create perfect backyard retreats. Picket fencing brings classic charm to front yards, while ranch rail styles work beautifully for larger properties. If you have a pool, vinyl pool fencing meets safety codes while looking great year-round.
Modern vinyl comes in over 10 color options beyond basic white. You can choose wood-grain textures that mimic cedar or oak, contemporary grays and blacks, or specialty finishes that complement your home's architecture.
The financial benefits are compelling too. Adding vinyl fencing can boost your property value by up to 5% ROI, making it one of the smarter home improvements you can make. When you factor in the decades of maintenance-free performance, vinyl often costs less than wood over time.
For more information about residential fencing options in New Hampshire, Massachusetts, and Maine, check out our comprehensive guide.
Most homeowners are surprised to learn that the toughest part of putting in a vinyl fence isn’t the physical labor—it’s the paperwork and site prep. While Brentwood Fence LLC can handle every step for you, it’s still helpful to understand what happens behind the scenes.
Start with the Legal Stuff
Even professional crews must call 811 at least 72 hours ahead so utility companies can mark gas, electric, and water lines. Next comes a review of local zoning setbacks (usually 3–5 ft from property lines) and any HOA guidelines on height, style, or color. Our team secures the permits for you, but we’ll keep you updated on all approvals so there are no surprises.
Confirm Your Property Lines
A fence that drifts onto a neighbor’s land can lead to legal headaches. Brentwood Fence uses your survey or arranges a licensed surveyor when boundaries are unclear. We generally install 6 in inside the property line for a buffer that keeps everyone happy.
Site Walk-Through
Before installation day, one of our project managers walks the entire fence route with you, noting slopes, tree roots, sprinklers, and drainage patterns. We stake the corners and pull mason’s string so you can visualize the final layout and make last-minute tweaks.
Pro-Grade Tools & Materials
Our crews arrive with commercial-grade augers, 4-ft levels, cordless impact drivers, and OSHA-approved safety gear. Every post hole gets a 6 in gravel base and high-strength, quick-set concrete—no shortcuts. For customers who still want to tackle part of the work themselves, we can deliver pre-routed posts, panels, and all hardware right to your driveway.
Want a deeper dive into style or code requirements in New Hampshire, Massachusetts, or Maine? See our comprehensive residential fencing guide.

When you hire Brentwood Fence LLC, the process is streamlined into a few predictable phases so you always know what’s happening on your property:
Vinyl expands and contracts more than wood, so the distance between posts must be exact—73 ¼ in on-center for 6-ft panels and 96 in for 8-ft panels. Our installers use string lines and laser levels to maintain perfect alignment and ensure the fence looks straight from every angle.
New England lots rarely sit perfectly flat. Brentwood crews use a step-method for sharp grades and rackable panels for gentle slopes, keeping the top line crisp and level. On extreme inclines, adjustable steel collars inside select posts let us fine-tune after winter frost heave.
Relax! You only need to provide clear access to the work area and keep pets or children safely indoors. Our team carries full liability insurance and follows strict safety protocols, so you can focus on watching your new privacy oasis take shape.
If you prefer a hybrid approach—such as digging your own post holes or handling cleanup—let us know. We offer flexible service packages, including materials-only delivery for skilled DIYers.
For a turn-key quote or to learn more about our workmanship warranty, visit our vinyl fencing installation services page.
After helping hundreds of homeowners with their fencing projects, we've learned that most problems come from three simple mistakes that are easy to avoid. Let's talk about what can go wrong and how to keep your project on track.
The Most Costly Mistakes We See
The biggest heartbreak? Digging shallow post holes. We've seen beautiful fences that looked perfect for six months, then started leaning after the first winter. Always dig to one-third the post height - it's not negotiable in New England's freeze-thaw climate.
Tight post spacing is another fence killer. Vinyl needs room to expand and contract with temperature changes. When posts are crammed too close together, panels can buckle or crack during hot summer days.
Here's one that makes us cringe: hammering vinyl directly. That satisfying "thwack" of a hammer might feel productive, but it creates stress cracks that show up months later. Always use a rubber mallet or place a wood block between your hammer and the vinyl.
Don't forget those expansion gaps either. A quarter-inch between panels seems like nothing, but it prevents thousands of dollars in damage when materials expand in heat.
What You'll Really Spend
Putting in a vinyl fence typically costs between $20 and $40 per linear foot for materials and basic installation. For a typical 150-foot backyard fence, you're looking at $3,000 to $6,000 total.
Materials usually run $15 to $25 per linear foot, while tools and equipment rental adds another $200 to $500 to your project. Don't forget permit fees - they range from $50 to $200 depending on your town's requirements.
Should You Go DIY or Call the Pros?
Vinyl fencing is definitely DIY-friendly for most homeowners. But there are times when calling professionals makes more sense financially and practically.
Consider professional installation if you're tackling more than 200 linear feet, dealing with significant slopes, or facing complex local building codes. Professional installation typically adds $10 to $20 per linear foot, but it often comes with labor warranties that protect your investment.
Warranty Protection That Actually Matters
Most quality vinyl fences come with limited lifetime warranties covering material defects, UV protection, and structural integrity. These aren't just marketing gimmicks - they reflect the confidence manufacturers have in their products.
The key is understanding what's covered. Manufacturing defects and color fading are typically covered, but damage from improper installation or extreme weather events usually isn't.
Keeping Your Fence Looking Great
The beauty of vinyl is how little maintenance it requires. Annual cleaning with a garden hose takes care of most dirt and pollen. For stubborn stains, mild soap and a soft brush work wonders.
Winter preparation is simple but important. Remove heavy snow buildup to prevent stress on panels and posts. A quick inspection each spring helps catch any loose hardware or minor damage before it becomes expensive.
When small problems do pop up, address them quickly. A loose post cap or damaged panel is easy to fix, but ignoring it can lead to bigger issues down the road.
Go here for expert guidance on professional fence installation throughout New Hampshire, Massachusetts, and Maine.

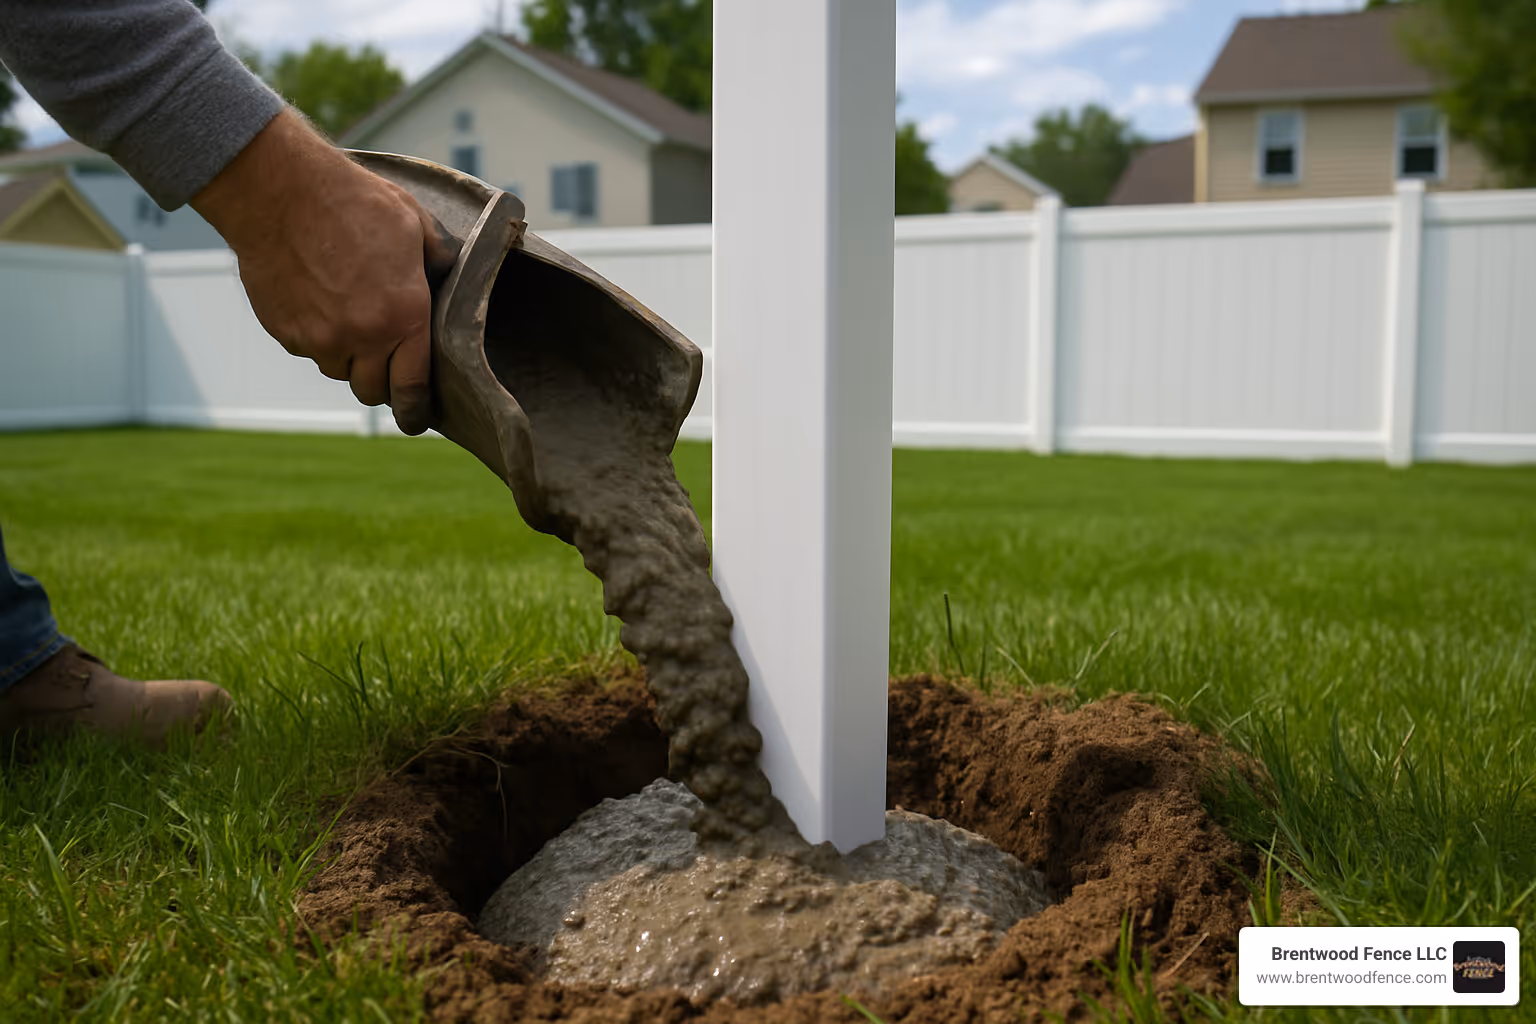
Absolutely, and here's why this matters more than you might think. While some manufacturers suggest you can get away with tamped earth for temporary setups, putting in a vinyl fence the right way means using concrete for every single post.
Vinyl posts are hollow by design, which keeps them lightweight and easy to handle. But that same hollow construction means they're counting on concrete to provide the backbone your fence needs. This is especially true here in New England, where our freeze-thaw cycles can shift and heave posts that aren't properly anchored.
Quick-set concrete is your best friend for this job. It cures in just 20 to 30 minutes, so you're not waiting around all day between posts. For gate posts, bump up the concrete amount and consider adding steel reinforcement - these posts work harder than the rest of your fence and deserve the extra support.
Soil conditions can make or break your fence project, but every soil type has its workaround. Let's tackle the most common challenges:
Rocky soil can be intimidating, but it's not impossible. Rent a power auger with rock-cutting capability - your back will thank you. A steel digging bar works wonders for breaking up stubborn rocks. You might need to adjust your post spacing slightly to dodge the biggest rocks, and use extra concrete to fill in the gaps around smaller stones.
Sandy soil presents the opposite challenge. Sand shifts and settles, so you'll want to dig holes slightly wider to give your concrete more contact area. Use more concrete mix per post than you would in regular soil, and consider adding some bentonite clay to improve soil stability. Compact the sand around your concrete for better support.
Clay soil needs special attention for drainage. Clay expands and contracts with moisture, so proper drainage becomes critical. Add extra gravel at the bottom of your holes and consider mixing in some sand to improve drainage around your posts.
Here's the beautiful truth about vinyl fencing - it's almost maintenance-free, but a little attention goes a long way toward keeping it looking like new.
Your annual routine should be refreshingly simple. Rinse your fence with a garden hose to remove dirt and pollen buildup. For stubborn stains, a mild soap solution does the trick. Take a few minutes to check that gate hardware is still tight and inspect for any damage from storms or impacts.
Stain removal is straightforward when you know the right approach. Mildew responds well to a vinegar solution or specialized vinyl cleaner. Hard water stains practically disappear with white vinegar. Scuff marks from kids' toys or lawn equipment come off with a magic eraser or baking soda paste. Tree sap requires mineral spirits on a soft cloth, but it comes off easily.
What you shouldn't do is just as important. Skip the abrasive cleaners and steel wool - they'll scratch the surface. Avoid pressure washing at close range, and don't use bleach-based cleaners regularly. Never paint vinyl fencing, as it voids your warranty and looks terrible after a few seasons.
Seasonal care keeps your fence performing year-round. Spring is inspection time - check for winter damage and give everything a thorough cleaning. Summer maintenance focuses on UV damage checks and cleaning as needed. Fall means removing debris and checking gate hardware before winter. In winter, remove snow buildup but avoid using metal tools that could scratch the vinyl.
The reward for this minimal maintenance? A fence that looks great for decades while your neighbors are out there scraping and painting their wood fences every few years.
Putting in a vinyl fence transforms your property in ways that go far beyond just marking boundaries. You're creating a private sanctuary, boosting your home's value, and setting yourself up for decades of worry-free enjoyment.
The journey from planning to completion might seem overwhelming at first, but thousands of homeowners have successfully tackled this project with amazing results. The secret lies in taking your time with the planning phase and following the step-by-step process we've outlined.
Your investment pays off immediately - that first evening when you can relax in your newly private backyard, knowing your fence will look just as good twenty years from now. No more weekend painting projects, no more replacing rotted boards, no more worrying about your fence falling apart after a harsh New England winter.
The satisfaction of completing this project yourself is incredible, but we understand it's not right for everyone. Maybe you're dealing with challenging terrain, or perhaps you simply prefer to have professionals handle the installation while you focus on other priorities. Both approaches are perfectly valid.
At Brentwood Fence LLC, we're here to support your vision regardless of which path you choose. Our team has helped countless homeowners throughout New Hampshire, Massachusetts, and Maine turn their fencing dreams into reality. We can provide everything from a simple materials list for your DIY project to complete professional installation with our lifetime craftsmanship warranty.
The durability and beauty of vinyl fencing means you're making a smart long-term investment. While your neighbors are dealing with maintenance headaches and replacement costs, you'll be enjoying your beautiful, maintenance-free fence year after year.
Ready to take the next step? We'd love to help you turn your plan into reality. Whether you need a professional consultation, a detailed materials list, or a complete installation quote, we're just a phone call away. Get your free fencing installation estimate today and find how easy it can be to have the fence you've always wanted.
Your new vinyl fence will be the finishing touch that makes your property feel complete - and you'll have the peace of mind that comes with knowing it's built to last.
Copyright 2022 Brentwood Fence | All Rights Reserved | Sitemap | Website by Plumb Development a Digital Marketing Agency