Blog Content
5
Aug
2025
Vinyl fence installation is one of the best ways to boost your home's curb appeal, privacy, and security—without the hassle of frequent upkeep. If you're looking for a quick answer on how vinyl fence installation works, here's a simple step-by-step overview:
Vinyl Fence Installation in 5 Easy Steps:
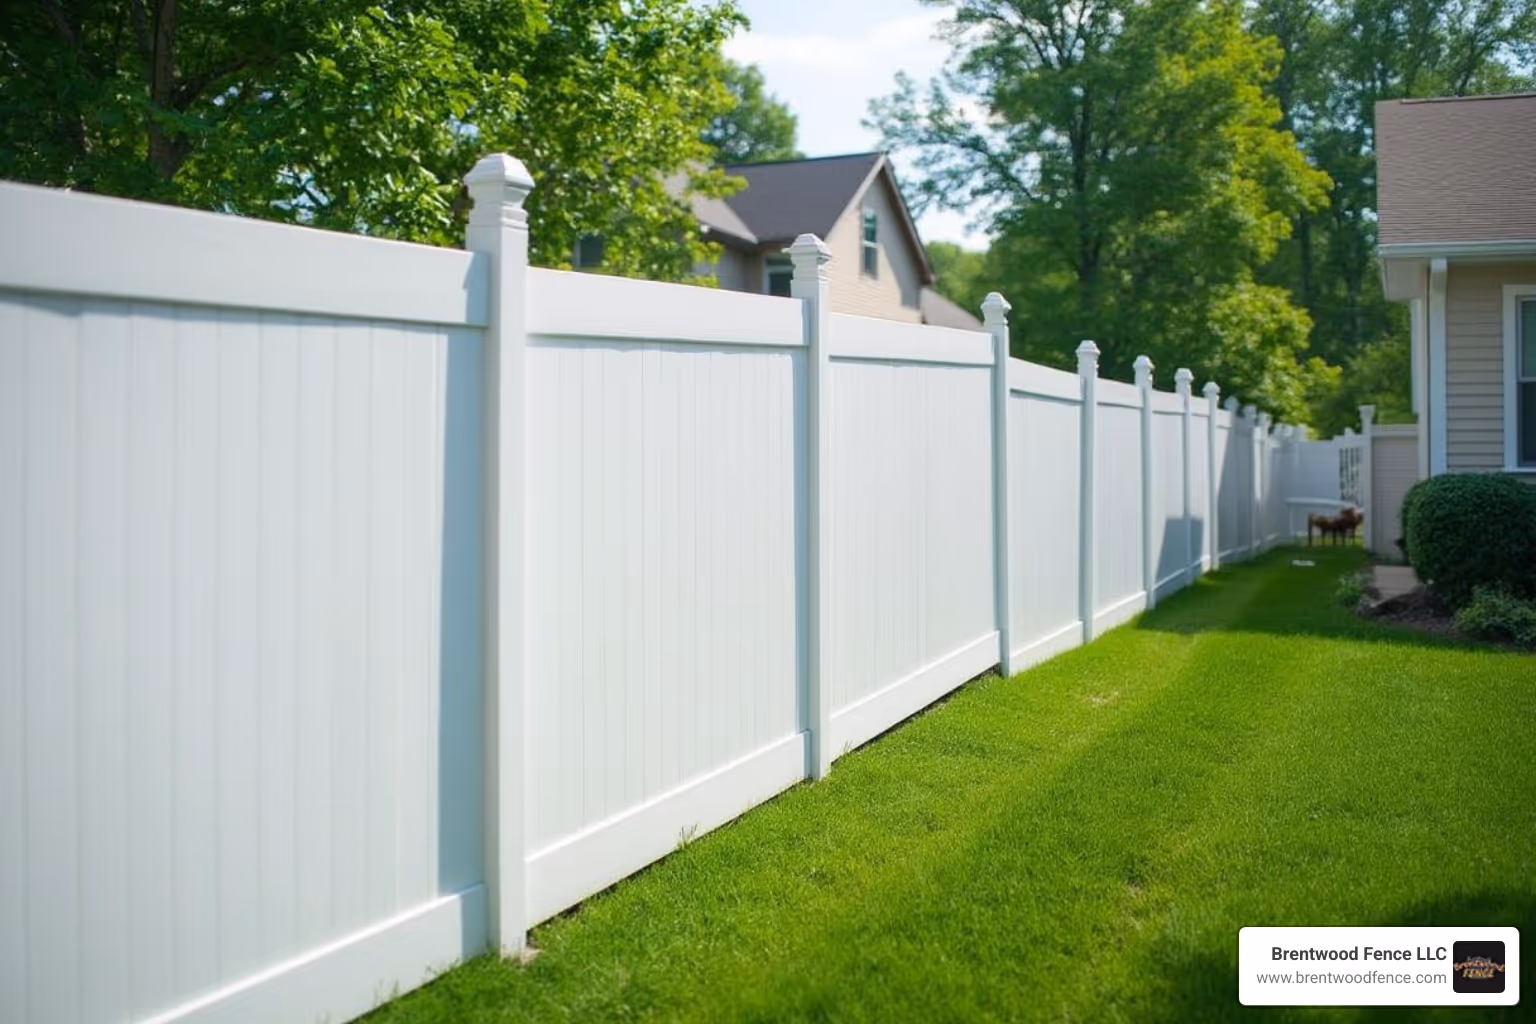
Vinyl fencing is durable, maintenance-free, and can often be installed in just one day by professionals. Most products carry a lifetime limited warranty and resist weather, fading, and rot.
"Vinyl fencing offers superior durability, requires almost no maintenance, and adds instant value to your property."
To see the installation process at a glance, check out the infographic below.

Vinyl fence installation terms you need:
Before you start digging, proper planning is crucial for a successful vinyl fence installation. We've seen too many homeowners rush into projects only to find they've violated local codes or encroached on a neighbor's property. Here's what you need to know:
Property Survey and BoundariesStart by locating your property lines. You'll need to know exactly where your property ends and your neighbor's begins. Check your deed for any easements that might affect fence placement. If you're unsure about boundaries, consider hiring a professional surveyor—it's much cheaper than having to move a fence later.
Zoning Codes and Building PermitsEvery municipality has different rules about fence height, setbacks, and materials. In New Hampshire, Massachusetts, and Maine, regulations vary significantly between towns. Generally, you'll need to maintain a setback of 2-6 inches from your property line, and fence height restrictions typically range from 4-6 feet for front yards and up to 8 feet for backyards.
Most residential vinyl fence installations don't require permits, but pool enclosures almost always do. Pool fences must meet specific safety requirements: minimum 4-foot height, maximum 4-inch spacing between pickets, and self-closing, self-latching gates.
Underground Utilities - Call 811This step is mandatory and free. Call 811 at least 48 hours before digging to have underground utilities marked. We can't stress this enough—hitting a gas line or electrical cable isn't just dangerous, it's expensive. The service marks water, sewer, gas, electric, and telecommunications lines with colored flags or spray paint.
Frost Line ConsiderationsIn our New England service area, the frost line ranges from 3-4 feet deep. Your fence posts need to extend below this line to prevent frost heaving, which can push posts out of alignment over time. This means digging deeper holes, but it ensures your fence stays straight for decades.
Neighbor NotificationWhile not legally required, it's good practice to discuss your fence plans with adjacent neighbors. They might have concerns about the fence line or style, and addressing these upfront prevents conflicts later. Plus, they might even want to share costs if the fence benefits both properties.
For more detailed information about local requirements, check out our FAQ: Fence Installation Service NH, MA & ME page.
Once you've handled the paperwork and notifications, it's time to mark your fence line. Use wooden stakes and mason's string to create a clear, straight line. This string line will be your guide throughout the installation process.
Boundary Markers and Setback RulesPlace stakes at each corner of your fence line, then tie a string between them. The string should be taut and level. Most local codes require fences to be set back 2-6 inches from the actual property line—check your local requirements. This setback prevents disputes if your survey is slightly off and gives you room to maintain the fence.
Slope AssessmentWalk your fence line and note any slopes or grade changes. Vinyl fencing can handle slopes in two ways: stepping (where panels step down the slope) or racking (where panels follow the slope's angle). Gentle slopes under 10% can usually be racked, while steeper slopes require stepping.
Having the right tools and materials makes vinyl fence installation much smoother. Here's what you'll need:
Essential Tools:
Materials Needed:

The number of posts you'll need depends on your panel length. For a 100-foot fence, you'll need approximately 14 posts with 8-foot panels or 18 posts with 6-foot panels. Don't forget to account for gate posts, which require additional reinforcement.
For professional installation services, visit our Vinyl Fencing Installation Services page.
Not all vinyl fencing is created equal. Here's what to look for:
UV-Resistant VinylQuality vinyl contains UV inhibitors that prevent fading and brittleness. Look for products with titanium dioxide, which provides the best UV protection. Cheaper vinyl without proper UV protection will yellow and become brittle within a few years.
Wind Rating and ThicknessVinyl fence thickness typically ranges from 0.135 to 0.150 inches. Thicker vinyl handles wind better and lasts longer. In our New England climate, we recommend at least 0.140-inch thickness for durability.
Lifetime WarrantyReputable manufacturers offer lifetime limited warranties on their vinyl products. This typically covers defects in materials and workmanship, plus protection against fading, cracking, and peeling. Installation warranties are usually separate and range from 1-2 years.
Color OptionsWhile white remains the most popular choice, vinyl fencing now comes in tan, gray, brown, and even black. Some manufacturers offer wood-grain textures that mimic natural wood without the maintenance requirements.
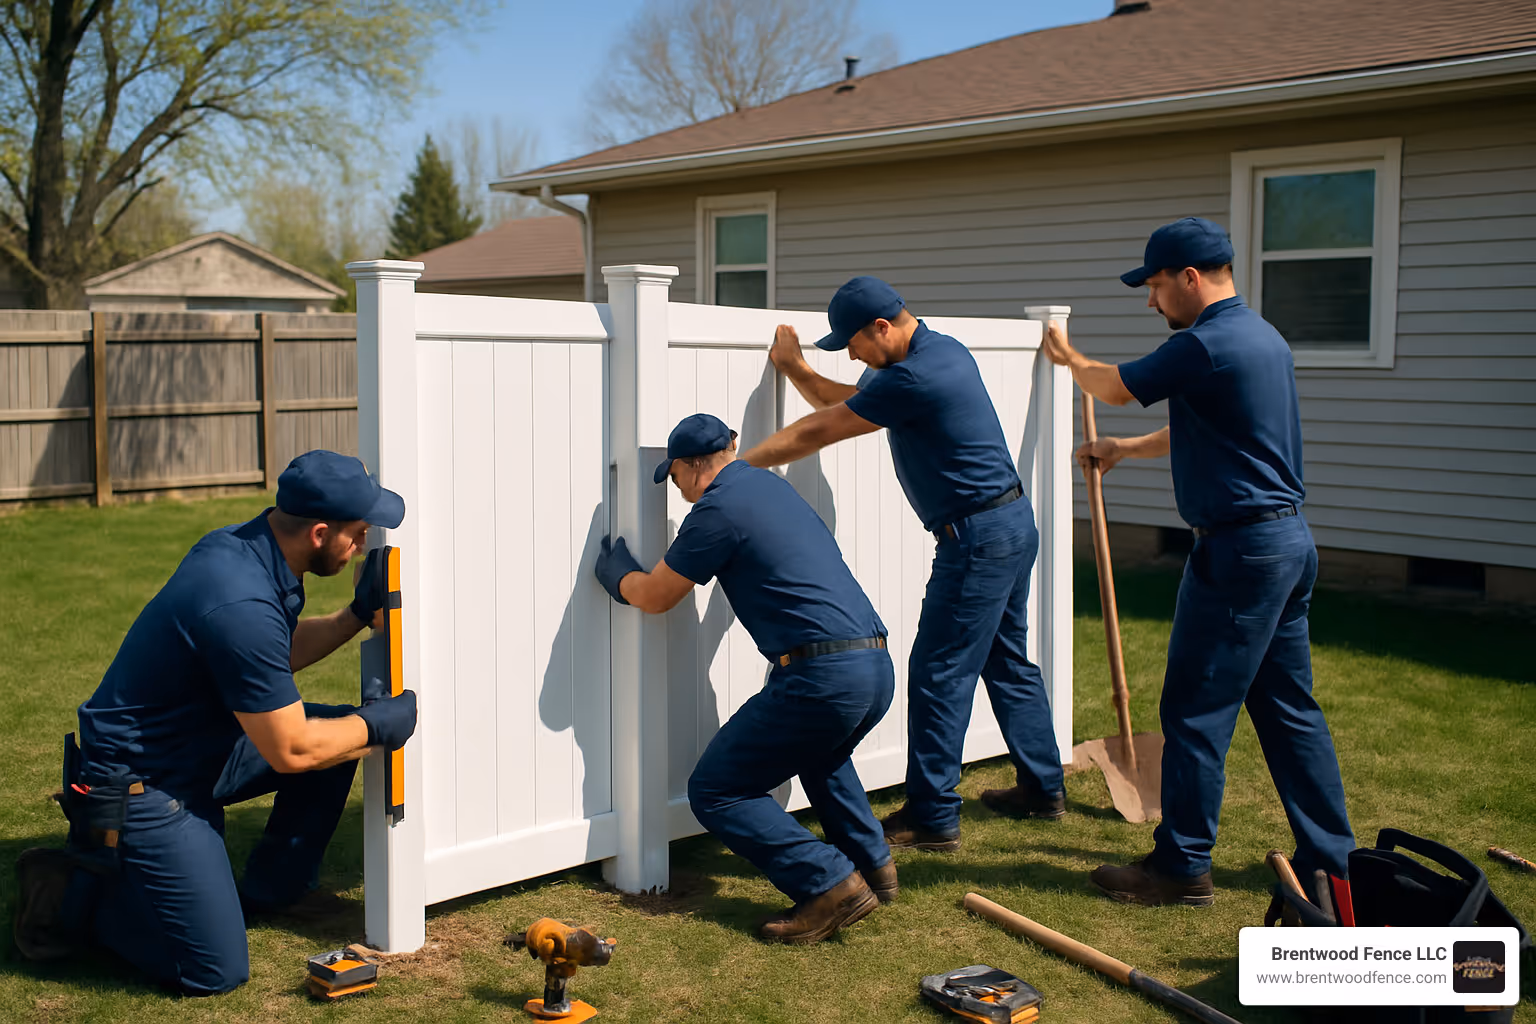
Now we get to the actual installation process. Professional vinyl fence installation follows a specific sequence that ensures a straight, durable fence. Here's how we do it:
Step 1: Set Your String GuidelinesWith your fence line marked, run a string line between corner stakes. This string should be perfectly straight and level—it's your reference for the entire installation. Use a line level to ensure accuracy.
Step 2: Mark Post LocationsMeasure and mark where each post will go. Standard spacing is 6-8 feet on center, depending on your panel size. Mark these locations with spray paint or small stakes.
Step 3: Dig Post HolesHere's where the "one-third rule" comes in: dig holes that are one-third the height of your above-ground post plus 6 inches for gravel. For a 6-foot fence, dig holes about 30 inches deep. Make holes about 10 inches in diameter—three times the post width.
Step 4: Add Gravel BasePour 6 inches of gravel in each hole for drainage. This prevents water from pooling around the post base, which could cause frost heaving in winter.
Step 5: Set PostsPlace posts in holes, checking that they're plumb (perfectly vertical) with a 4-foot level. Brace posts temporarily with 2x4s if needed.
Step 6: Pour ConcreteMix quick-set concrete according to package directions. Pour around the post, leaving about 3 inches of space at the top. Slope the concrete surface away from the post to shed water. Allow concrete to cure for at least 24 hours before proceeding.
For a visual guide on leveling and plumbing posts, check out this helpful video: What Do Level and Plumb Mean?
Post installation is the most critical part of vinyl fence installation. Get this wrong, and your entire fence will be crooked or unstable.
Gravel DrainageThat 6-inch gravel base isn't optional—it's essential for proper drainage. Without it, water can pool around the post base, leading to frost heaving that will push posts out of alignment. Use clean, angular gravel, not rounded pea gravel.
The One-Third RuleThis rule ensures your fence has adequate support. For a 6-foot fence, you need at least 2 feet of post in the ground, plus 6 inches of gravel. This means digging 30-inch deep holes. It seems like a lot of work, but it's what keeps your fence standing straight for decades.
Bracing PostsWhile concrete cures, posts need temporary bracing to stay plumb. Use 2x4 lumber to create diagonal braces from the post to stakes in the ground. Check posts with a level on two adjacent sides—they must be perfectly vertical.
Once your posts are set and concrete has cured, it's time to install panels and gates.
Snap-Lock RailsMost quality vinyl fencing uses a snap-lock rail system. Bottom and top rails slide into routed grooves in the posts, then pickets snap into channels in the rails. This system is stronger than bracket-mounted panels and looks cleaner.
Self-Closing Latch SystemsFor gates, especially pool gates, install self-closing hinges and self-latching hardware. This ensures the gate always closes and latches automatically, meeting safety codes and providing security.
Hinge AlignmentGate posts need extra reinforcement—we recommend inserting aluminum I-beams inside hollow vinyl posts and securing them with galvanized screws. This prevents gate posts from sagging under the weight and stress of daily use.
Reinforcement I-BeamsFor corner posts and gate posts, aluminum reinforcement is essential. These posts handle more stress than line posts and need extra strength. The I-beam should extend the full length of the post and be secured with self-tapping screws.

Understanding the costs involved in vinyl fence installation helps you budget properly and make informed decisions about upgrades.
Basic Installation CostsAccording to current market data, vinyl fence installation costs $15-$40 per linear foot for materials, with labor adding another $5-$10 per linear foot. A 6-foot vinyl fence averages $25-$40 per linear foot installed.
Here's a cost breakdown for a typical 100-foot fence:
Post Count ImpactThe number of posts significantly affects cost. Using 8-foot panels instead of 6-foot panels reduces the post count from 18 to 14 for a 100-foot fence, saving about $100 in materials plus labor.
Additional Costs to Consider
Popular Upgrades
For current pricing information, check out this latest cost guide.
Maintenance RequirementsOne of vinyl fencing's biggest advantages is minimal maintenance. Here's what's required:
Annual CleaningRinse your fence with a garden hose and mild soap solution once or twice a year. For stubborn stains, use a soft brush—never use abrasive cleaners or pressure washers on high settings.
Annual InspectionCheck for loose screws, damaged panels, or gate hardware issues. Tighten any loose fasteners and replace damaged components promptly.
Warranty ClaimsQuality vinyl fencing comes with lifetime limited warranties covering fading, cracking, and peeling. Keep your purchase documentation and photos of any issues for warranty claims.
For more privacy options and maintenance tips, visit our guide on Yard Privacy Fencing Options in NH, MA & ME.

Posts should be set to a depth equal to one-third of the above-ground height plus 6 inches for gravel. For a 6-foot fence, dig holes 30 inches deep (24 inches for the post, 6 inches for gravel). In New England, posts must extend below the frost line (3-4 feet deep) to prevent frost heaving.
Yes, vinyl fencing can be installed on slopes using two methods:
Stepping Method: Best for slopes over 10%. Panels step down the slope, maintaining level rails. Each panel drops to follow the grade while staying horizontal.
Racking Method: For gentle slopes under 10%. Panels follow the slope's angle, with rails remaining parallel to the ground. Not all vinyl systems support racking, so check with your manufacturer.
With proper installation and minimal maintenance, vinyl fences last 20-30 years or more. Quality vinyl with UV protection won't fade, crack, or become brittle like cheaper alternatives. Most manufacturers offer lifetime limited warranties, and vinyl fences often outlast the homes they surround.
Unlike wood fences that need staining or painting every 2-3 years, vinyl fences maintain their appearance with just occasional cleaning. This makes them more cost-effective over time despite higher upfront costs.
Vinyl fence installation offers homeowners in New Hampshire, Massachusetts, and Maine an excellent way to improve privacy, security, and curb appeal without ongoing maintenance headaches. While the process involves careful planning and precise execution, the results are worth it—a fence that can last decades while looking like new.
The key to successful vinyl fence installation lies in proper planning, quality materials, and attention to detail during post installation. Posts set incorrectly will cause problems for years to come, while posts set properly will keep your fence straight and strong through New England's harsh winters and humid summers.
At Brentwood Fence LLC, we've seen the difference between DIY installations and professional work. While ambitious homeowners can tackle this project, the specialized tools, experience with local codes, and warranty protection that come with professional fence installation company often make it the better choice.
Whether you decide to hire professionals or tackle the project yourself, investing in quality materials and taking time to do the job right will give you a fence that improves your property value and provides years of maintenance-free service.
Ready to get started? Contact us for a Free Fencing Installation Estimate and let our experienced team help you choose the perfect vinyl fencing solution for your property.

Copyright 2022 Brentwood Fence | All Rights Reserved | Sitemap | Website by Plumb Development a Digital Marketing Agency