The Picket Line: A Guide to Installing Wood Picket Fence Panels
30
Sep
2025
Author:
Rob Thibeault
Why Professional Installation of Wood Picket Fence Panels Matters
Installing wood picket fence panels properly requires careful planning, the right tools, and attention to detail that can make the difference between a fence that lasts decades and one that fails within a few years.
Quick Installation Overview:
Site preparation - Mark boundaries, call 811, gather materials
Post installation - Dig holes 1/3 the post height, set in concrete
Panel attachment - Mount prefab panels or build component-by-component
Gate installation - Use proper hardware to prevent sagging
Finishing - Apply stain or paint after wood acclimates
A wood picket fence does more than just mark your property lines. It improves curb appeal, provides security, and can increase your home's value when installed correctly. The classic white picket fence remains a symbol of the American dream, but today's options include cedar, pine, and various stain colors.
The key to success lies in proper post installation. As one expert noted, "1/3 of a fence post should be underground" for stability. Posts typically need to be spaced 6-8 feet apart, with holes dug to the frost line and set in concrete.
Whether you choose prefabricated panels (faster installation) or component-built fencing (better follows ground contours), the process requires precision. Professional fence installation ensures your fence will withstand weather, remain level, and maintain its appearance for years to come.
Phase 1: Pre-Installation Planning and Preparation
Proper planning is the foundation of a long-lasting fence. Before any digging begins, our professional approach to installing wood picket fence panels involves meticulous preparation to ensure a smooth process and flawless results. We handle everything from material selection to navigating local regulations. For a broader look at your choices, our guide to Residential Fencing Options NH, MA, ME is a great resource.
Choosing Your Wood and Hardware
The right materials are crucial for durability in the New England climate.
Cedar is a top choice, prized for its natural resistance to rot, decay, and insects. It can be stained to maintain its rich color or left to weather to an attractive silvery-gray.
Pressure-treated pine offers excellent value and durability. The treatment process protects it from rot and insects, and it provides a perfect surface for painting, holding color evenly for years.
Redwood provides premium beauty and natural resistance similar to cedar, typically at a higher price point.
Hardware is just as important. We use stainless steel screws for superior holding power on structural connections and hot-dipped galvanized nails for rust-resistant, efficient picket attachment. Post caps are a must-have, providing a decorative finish while protecting the vulnerable end grain of posts from water damage.
Essential Tools for a Professional Job
Professional results require professional tools. Our crews are equipped with:
Post hole diggers and power augers for fast, consistent holes.
Post levels and spirit levels to ensure every component is perfectly plumb and level.
Mason's line and string to maintain perfectly straight fence lines over any distance.
Circular saws, drill drivers, and tape measures for precise cuts, spacing, and fastening.
Preparing the Site and Marking the Layout
Careful site prep prevents future headaches. Our process includes:
Verifying property lines to ensure the fence is built in the correct location, typically setting posts 4 inches inside the line.
Handling local building codes and HOA rules across New Hampshire, Massachusetts, and Maine to ensure full compliance.
Communicating with neighbors to ensure a smooth construction process for everyone.
Marking the fence line with stakes and string, with post locations clearly marked (usually every 8 feet).
Calling 811 to locate buried utility lines. This is a critical safety step that is required by law. Hitting a buried gas, water, or electrical line is dangerous and can lead to expensive repairs.
Phase 2: The Professional Process for Installing Wood Picket Fence Panels
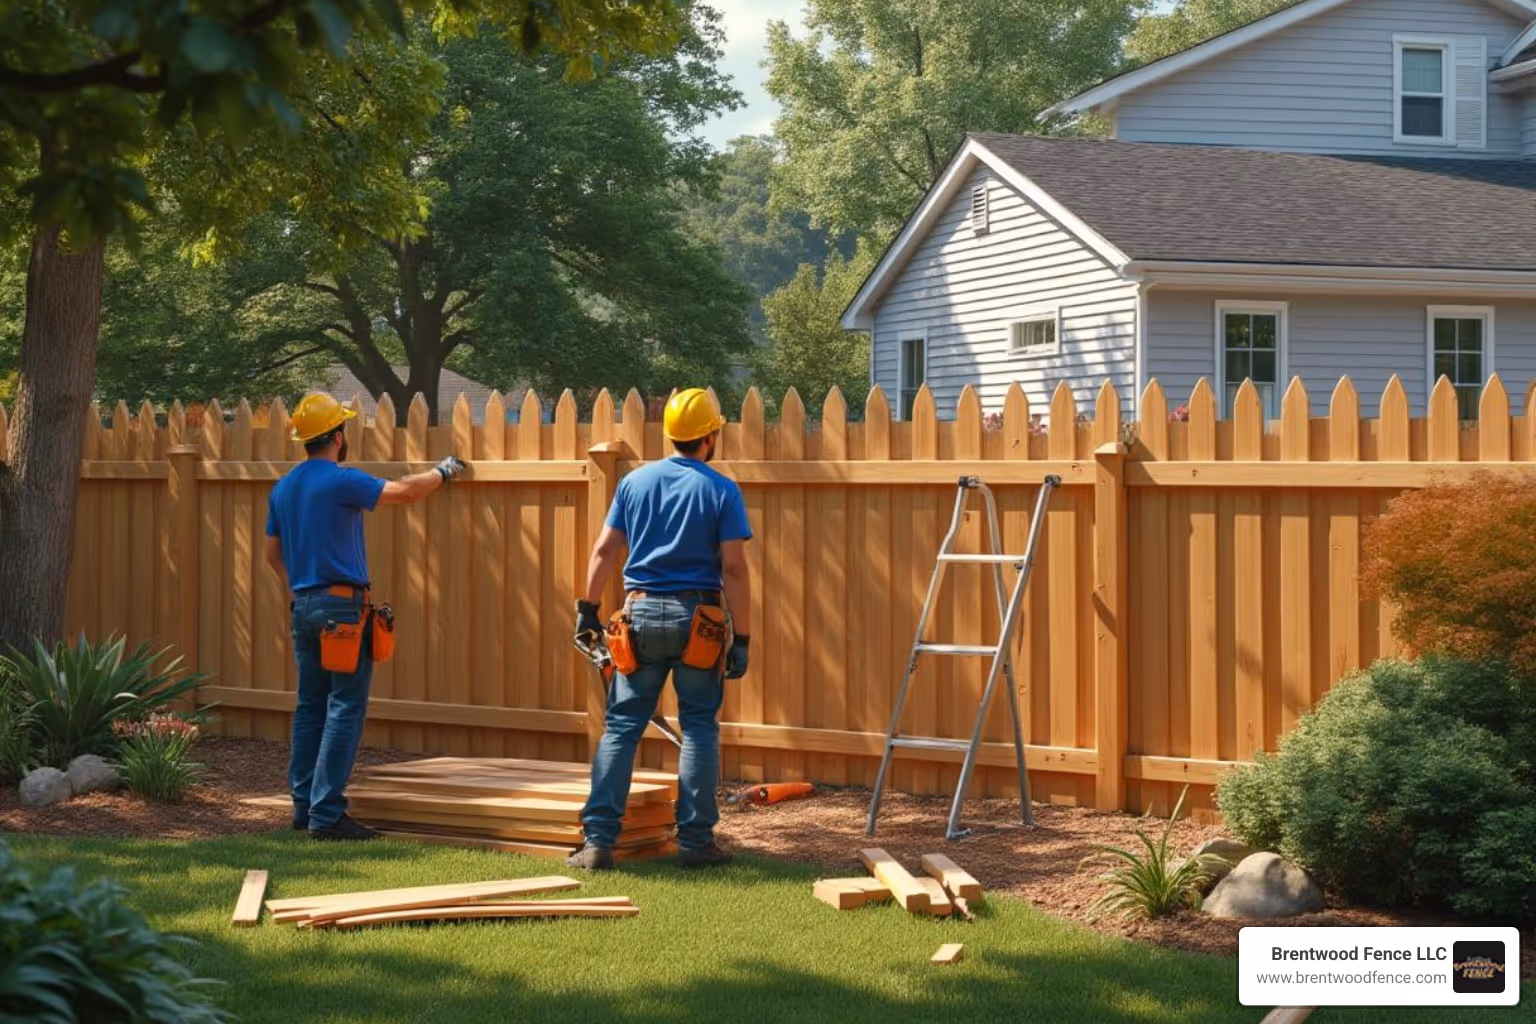
With planning complete, our team begins the physical installation. This phase is where experience and precision create the foundation for a fence that will stand strong for decades.
Fence posts are the backbone of your fence. If they aren't set correctly, the entire structure is compromised. That's why we dedicate significant attention to getting them perfect.
Digging and Setting Fence Posts
Proper post installation is critical for the longevity of your fence.
Post Hole Depth: We follow the "one-third rule," burying at least one-third of the post. In New England, we must dig below the frost line (often 36 inches or deeper) to prevent frost heave from shifting the posts.
Post Hole Diameter: Holes are dug to about three times the post's width to allow ample room for concrete, ensuring a solid footing.
Drainage: A few inches of gravel at the bottom of each hole helps drain water away from the base of the wood post, preventing rot.
Alignment: We set corner and end posts first, then stretch a mason's line between them. This string acts as a precise guide to keep every intermediate post in a perfectly straight line.
Securing Posts with Concrete
For a fence that lasts, setting posts in concrete is non-negotiable. It provides the stability needed to withstand weather and time.
Mixing and Pouring: We mix concrete to a proper consistency—not too wet or too dry—and pour it around each post, filling the hole to a few inches below ground level.
Removing Air Pockets: We work the concrete with a bar to eliminate air pockets, which can create weak spots.
Water Protection: As a professional detail, we slope the top of the concrete footing away from the post. This small step directs rainwater away from the wood, adding years to the post's life.
Bracing and Curing: Each post is braced with temporary supports to hold it perfectly plumb while the concrete cures for at least 24-48 hours. Rushing this step is a common mistake that leads to wobbly, unstable fences.
The importance of plumb and level posts cannot be overstated. A post that is even slightly off-kilter will be noticeable across the entire fence line. For more on these terms, see What Do Level and Plumb Mean?.
Phase 3: Assembling the Fence and Gate
With the posts securely set in concrete, the fence begins to take shape as we assemble the main structure. This phase involves attaching the horizontal rails and then the pickets or prefabricated panels.
Attaching Horizontal Rails (Stringers)
Horizontal rails, or stringers, are the framework that supports the pickets. Proper installation is key to the fence's strength and appearance.
Attachment: We attach rails to posts using strong exterior-grade screws or specialized fence brackets for a robust connection. To prevent wood from splitting, we pre-drill pilot holes.
Strength: For long fence runs, we stagger the rail joints so that they don't end on the same post. This technique greatly improves the fence's overall structural integrity.
Placement: A standard picket fence has a top and bottom rail. The bottom rail is typically 7-12 inches from the ground, while the top rail sits near the top of the pickets. Taller fences may get a middle rail for added support.
A Guide to Installing Wood Picket Fence Panels
We ensure a beautiful, durable result whether using prefabricated panels or building the fence one picket at a time.
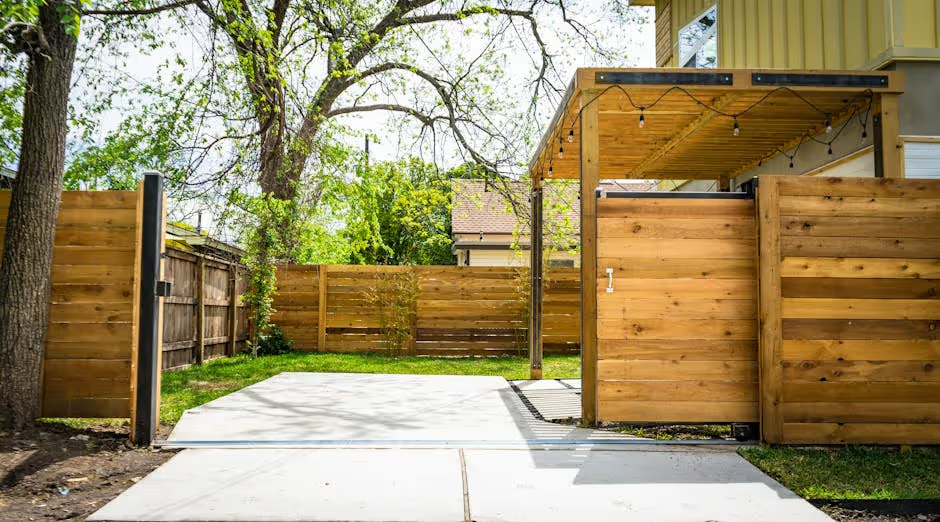
Prefabricated Panels vs. Component-Built: Prefab panels are pre-assembled and speed up installation significantly. Component-built fences, where individual pickets are attached on-site, offer more flexibility to follow ground contours and create custom designs.
Picket Spacing: Consistent spacing is crucial for a professional look. We use a spacer block (typically 2.5 inches) to ensure every gap is identical.
Handling Slopes: On uneven terrain, we can "rack" prefabricated panels, allowing them to flex and follow the ground's slope. For steeper grades or component-built fences, we set each picket to a string line to ensure a uniform appearance that follows the contour of the land.
Building and Hanging a Secure Fence Gate
A gate must be built and hung correctly to function properly and last for years.
Frame and Hardware: We build gates with a sturdy frame, often in a Z-brace design, to prevent sagging. We use high-quality gate hardware kits and anti-sag kits with diagonal supports to counteract gravity over time.
Installation: Hinges and latches are installed to ensure a smooth swing and secure closure. We allow for proper gaps (e.g., 3/4-inch for a walk gate) and ensure there is 1-2 inches of clearance between the bottom of the gate and the ground to prevent dragging.
Phase 4: Finishing and Long-Term Maintenance
With the fence built, the final steps are to protect the wood with a quality finish and establish a simple maintenance routine. This ensures your fence will remain a beautiful and functional asset for many years.
Applying Finishes and Preservatives
A proper finish is like sunscreen for your fence, protecting it from moisture and UV rays.
Drying Time: If you've chosen pressure-treated lumber, it's crucial to let the wood dry for several weeks to a few months. It's ready for finishing when a few drops of water soak in rather than beading up.
Paint vs. Stain: Paint offers maximum protection and a classic look, making it a great choice for pine fences. Stain penetrates the wood to improve its natural grain and character, which is ideal for cedar or redwood.
Sealer: Even if you prefer the natural weathered look, applying a clear exterior wood sealer will protect against moisture damage and extend the life of the wood.
A little regular attention will keep your fence looking great for decades.
Annual Inspection: Each spring, walk the fence line to check for loose or damaged pickets, signs of rot, and loose fasteners or gate hardware.
Cleaning: A gentle wash with mild soap and a soft brush will remove most dirt and mildew. If using a pressure washer, always use the lowest setting to avoid damaging the wood fibers.
Vegetation: Keep bushes, vines, and tree limbs trimmed back from the fence to allow for good air circulation and prevent moisture from being trapped against the wood.
Upkeep: Reapplying paint or stain every 2-3 years is the best way to maintain the protective layer. Promptly replacing a damaged picket or tightening a loose screw can prevent larger, more costly repairs down the road.
Here are answers to some of the most common questions we receive about installing wood picket fence panels.
How far apart should fence posts be for wood picket fence panels?
Post spacing is determined by the size of your fence panels. Most posts are spaced 6 to 8 feet apart, with 8 feet on center being the standard for common prefabricated panels. This spacing is critical for structural integrity. Placing posts too far apart will cause the horizontal rails to sag under their own weight over time, resulting in a wavy, unprofessional look.
What is the best type of wood for a picket fence?
The "best" wood depends on your budget, aesthetic goals, and desired maintenance level.
Cedar is a premium option known for its natural beauty and resistance to rot and insects.
Pressure-treated pine is a very popular choice that offers excellent durability at a more budget-friendly price. It is the ideal wood if you plan to paint your fence.
Redwood has similar benefits to cedar, offering a stunning look and natural durability, but it is typically the most expensive option.
Is it better to use nails or screws for a picket fence?
Professionals use both, but for different purposes. Screws are superior for structural connections, such as attaching the rails to the posts. They provide much greater holding power and won't loosen as the wood expands and contracts. Nails are often used to attach the pickets to the rails because they can be applied much faster with a pneumatic nailer, increasing efficiency.
Regardless of the choice, it is essential to use exterior-grade fasteners. We always use hot-dipped galvanized or stainless steel screws and nails to prevent rust streaks from ruining the appearance of your fence.
Conclusion
A well-crafted wood picket fence improves curb appeal, establishes clear boundaries, and adds a timeless charm to your property. The process of installing wood picket fence panels professionally ensures your investment is built to last, changing your yard into a welcoming space that you can be proud of.
From selecting the right wood to setting posts below the frost line in concrete, every step requires expertise. Professional installation steers challenges like sloping terrain and local building codes with ease, avoiding common DIY pitfalls like sagging gates and unstable posts. An expert-built fence is engineered to withstand New England's weather and provide years of enjoyment.
At Brentwood Fence LLC, we bring our commitment to quality craftsmanship to every project across New Hampshire, Massachusetts, and Maine. We understand that a fence is a significant addition to your home, and we build it right the first time.
When you're ready to transform your property with a beautiful, durable wood picket fence, trust the professionals.

 attached between posts, vertical pickets spaced 2.5 inches apart and 1 inch above ground, and decorative post caps on top - installing wood picket fence panels infographic")
 while being set in concrete. - installing wood picket fence panels")