Blog Content

26
May
2026
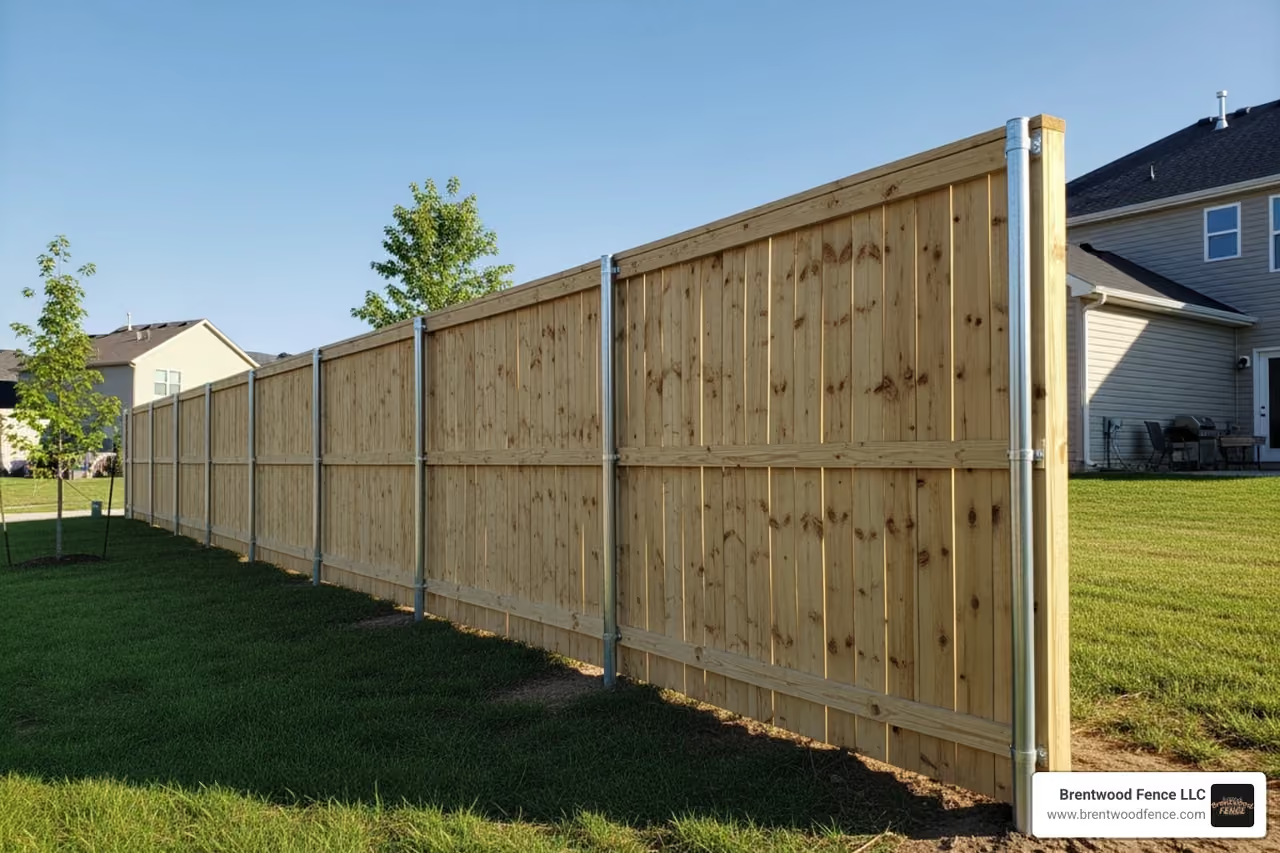
Understanding how to install metal posts for a wood fence starts with the core steps professionals follow:
Now, here is why this matters.
The average wooden fence post often lasts only 7 to 10 years before moisture and rot begin causing failure at the base. It does not matter how good the wood looked at the start - once it is buried, it is exposed to the conditions that usually shorten fence life.
The problem became more noticeable after 2003, when the EPA banned residential use of Chromated Copper Arsenate (CCA) in most consumer lumber applications. That chemical had been a major defense against rot and insects. Without it, pressure-treated posts generally do not perform the same way older materials once did.
The result is familiar to many homeowners: sagging panels, leaning posts, and the prospect of a major fence repair or replacement much sooner than expected.
Metal posts change that equation. By using galvanized steel or powder-coated metal posts as the structural foundation while keeping the natural look of wood for the rails and pickets, you can often extend your fence's lifespan by 2x, 3x, or even 4x compared to an all-wood build.
This guide covers what property owners in New Hampshire, Massachusetts, and Maine should know before planning a long-lasting wood fence with metal posts, with an emphasis on professional installation standards rather than step-by-step DIY shortcuts.
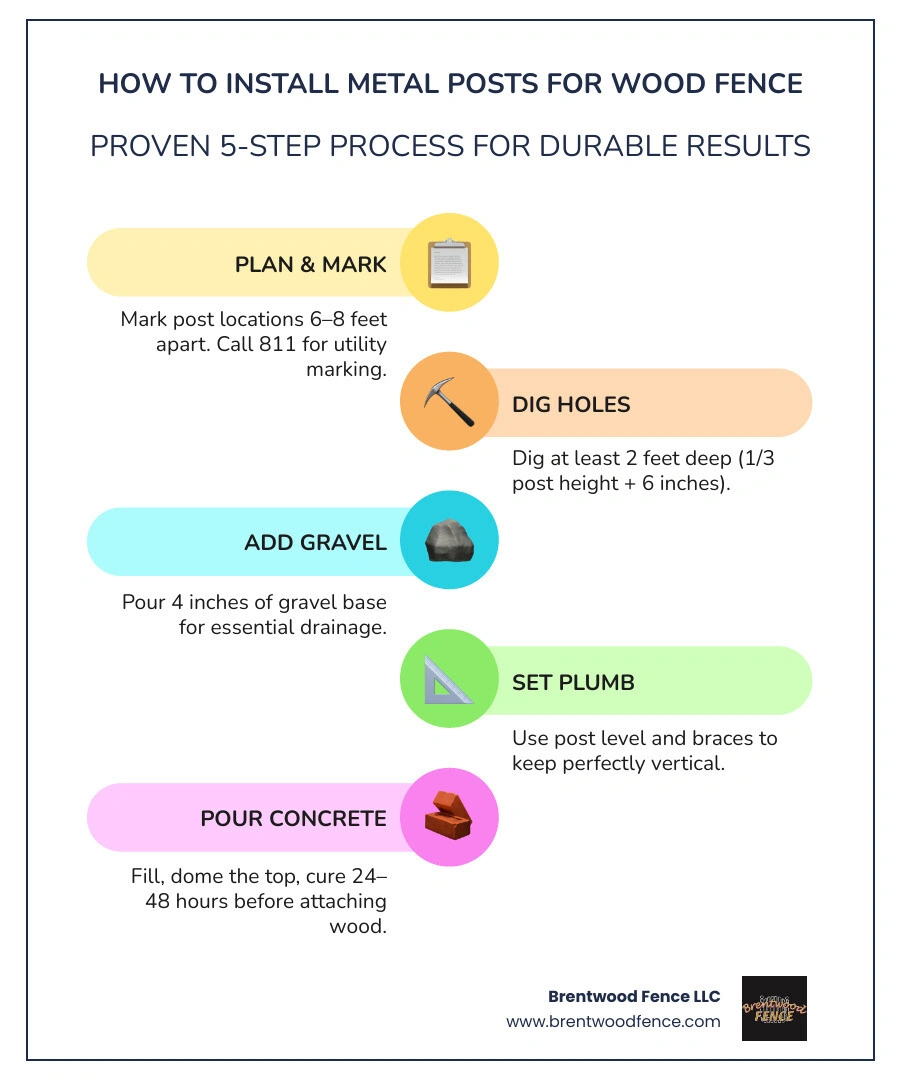
How to install metal posts for wood fence vocab to learn:
If we want a wood fence to last in New Hampshire, Massachusetts, or Maine, the weak link is usually not the rails or pickets. It is the buried post. Ground contact, seasonal moisture, and freeze-thaw cycles are tough on wood.
Metal posts solve that problem by replacing the part most likely to fail with a material that resists rot, insects, and ground moisture. They also stay straighter over time, which means fewer wavy fence lines and fewer panels that start acting like they have a personal grudge against gravity.
The biggest benefits are simple:
That matters a lot in our region. Frost movement can heave shallow posts, and wet spring soil can weaken wood quickly. Metal posts, especially galvanized steel, handle these conditions much better when installed with proper drainage and concrete finishing.
For most residential wood fences, galvanized steel is the best all-around choice. Powder-coated steel also performs well, especially when appearance matters and the coating is maintained.
The most common styles include:
For a typical 6-foot wood privacy fence, 2-3/8-inch round steel line posts are a common, reliable size. Lighter 1-3/8-inch pipe is generally too weak for supporting a full wood privacy fence. For corners, ends, and gate openings, we recommend upgrading to heavier posts and larger footings because those locations carry more load.
Here is a simple comparison:
Standard line posts are not enough for every section. We usually size up when the fence includes:
Gate posts deserve special attention. Hinges and latches create concentrated stress, and a sagging gate can turn a nice fence into a daily annoyance very quickly.
A durable fence starts before the first hole is dug. Good planning saves time, prevents code issues, and keeps spacing clean.
Start by confirming:
In New Hampshire, Massachusetts, and Maine, local rules vary by town, so we always recommend checking the current 2026 requirements before installation.

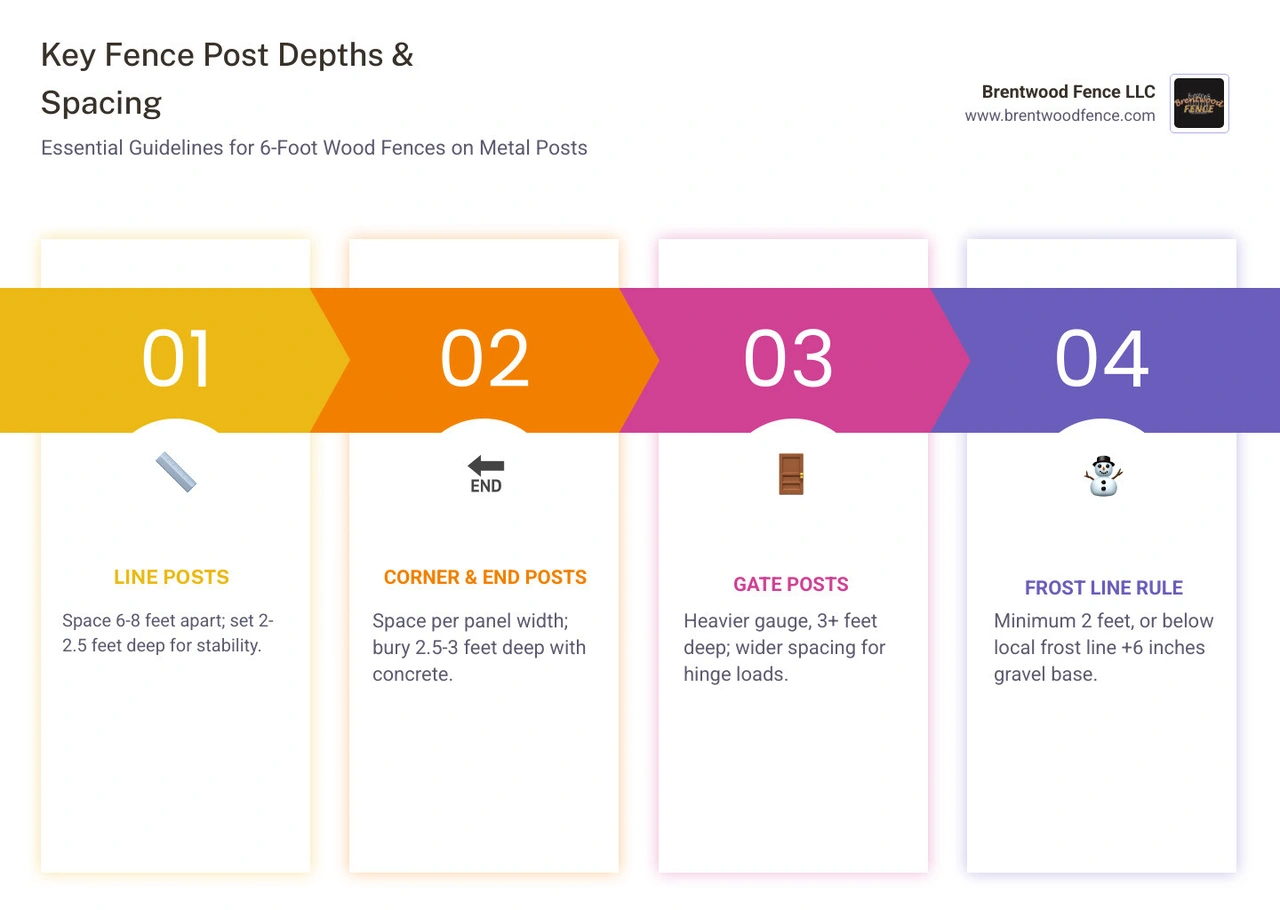
Most wood fences on metal posts perform best with posts spaced 6 to 8 feet apart. That range supports rails and panels without encouraging sagging. If you want a deeper dive into spacing logic, see How Far Apart Should Fence Posts Be: Spacing Made Simple - BarrierBoss and our own Guide: Metal Fence Posts for Wood Fence.
As a practical rule:
Always lay out the full run first with stakes and string. Then mark each post center so the final panels land evenly and the gate opening stays true.
Spacing depends on fence style, not just height.
Component-built fences are especially helpful on uneven ground because we can adjust rail and picket placement rather than forcing a rigid panel where it does not want to go.
Corners, ends, and gates are not normal posts. They are structural anchors.
Best practices include:
If a fence is going to fail early, the gate area is often where the drama starts.
Before installation, gather everything in one place. Stopping mid-project to hunt for hardware is a great way to test our patience, but not a great installation method.
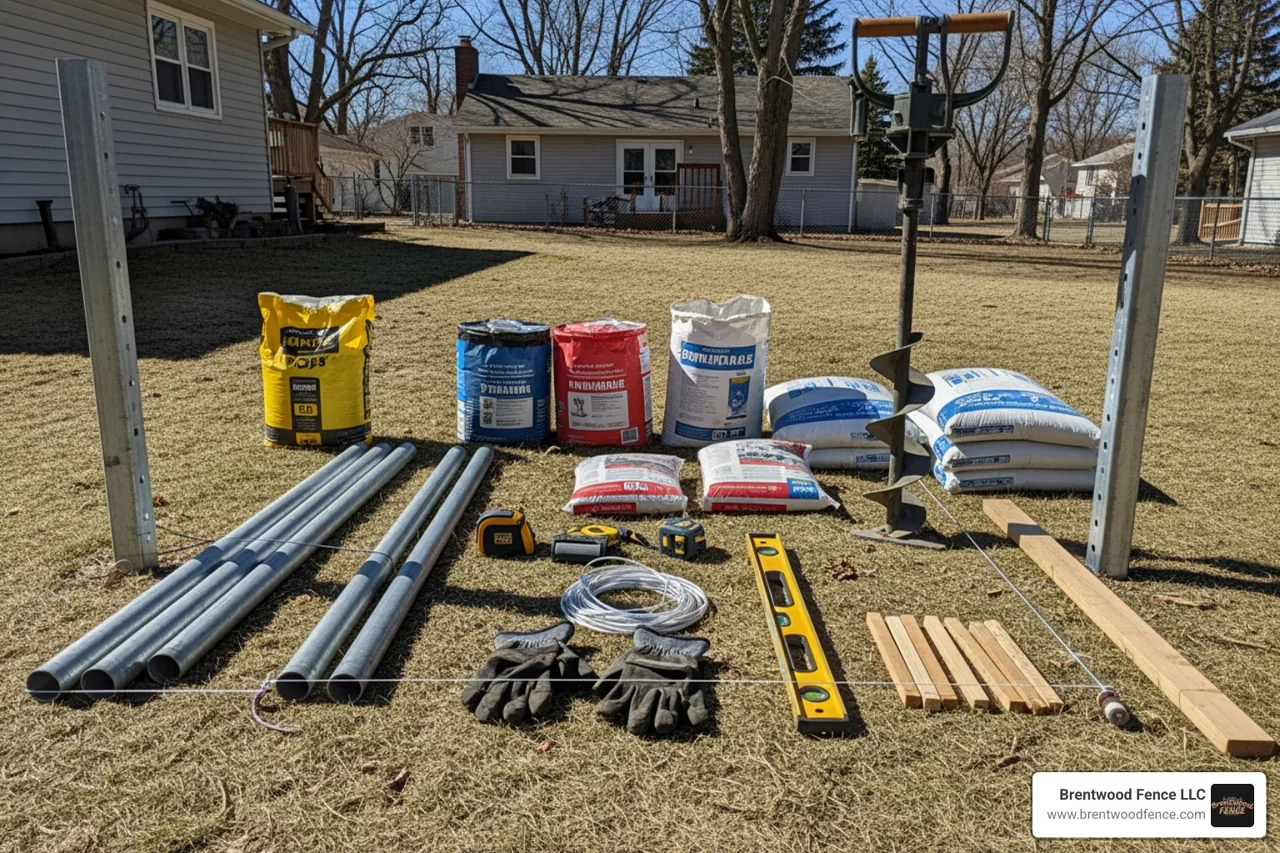
Basic tools and materials:
A power auger is worth considering for larger projects, especially in compacted or rocky soil.
The most reliable rule is to bury at least one-third of the total post length plus 6 inches, with a minimum of 2 feet in the ground. For many 6-foot wood fences, 2.5 to 3 feet deep is the better target, especially in frost-prone areas.
Depth should also account for:
For our service region, frost depth matters. A shallow install may look fine in summer and then shift after the first hard winter.
In most cases, the best answer is both:
This combination helps reduce trapped moisture while locking the post in place. Gravel alone may work in some driven-post systems or certain wet-ground conditions, but for standard residential wood fencing, concrete-set steel posts are the most dependable choice.
Use extra care in:
A solid rule is to dig the hole about three times the width of the post. Gate and corner posts usually need wider holes.
Drainage and corrosion prevention details matter just as much as depth:
These small details can add years to the life of the installation.
Once the layout is complete and utilities are marked, installation becomes a repeatable process: dig, base, set, brace, pour, cure, and verify.
Transfer your layout marks from string line to the ground. Dig each hole to the planned depth and diameter. Keep spoil piles organized so backfill and cleanup are easier.
Then:
This dry-fit step helps catch mistakes early, before concrete makes the decision permanent.
Plumb is non-negotiable. A slightly crooked post becomes a very obvious crooked fence.
Use:
Check plumb in both directions. Then step back and sight down the line. Sometimes a post is technically plumb but visually off-line, and your eye will catch what the level does not.
With the post braced and plumb, pour concrete around it. Premixed concrete gives the most consistent result, though fast-setting products can speed up installation when used correctly.
Fill the hole so the top of the concrete finishes slightly above surrounding grade, then shape it into a dome. That crown sheds water away from the steel instead of letting it pool at the base.
After pouring:
Rushing this step is one of the most common mistakes in fence installation.
Sloped yards need a design choice:
Stepped fences look cleaner along the top but leave larger gaps at the bottom on steep grades. Racked fences reduce bottom gaps, but they work best with component-built sections or rackable panels.
For more on panel-specific installation, see Installing Wood Fence Panel Metal Posts.
Once the posts are cured, the wood components can go on. This is where the hybrid system comes together: steel strength with a wood finish.
A helpful outside reference on attachment methods is Attach Wood Fence to Metal Posts - Grit Magazine .
Common attachment methods include:
For standard rail construction:
For prebuilt panels, match the panel width exactly to the post spacing. For individual pickets or slats, install rails first, then attach pickets with consistent spacing.
A long-lasting fence depends on moisture management.
We recommend:
Also pay attention to contact points. Pressure-treated lumber and low-grade hardware can be a bad combination if corrosion resistance is ignored.
The most common failures are very avoidable:
Metal posts are low maintenance, not no maintenance. A quick yearly inspection can prevent small issues from turning into expensive repairs.
Useful related reading:
Usually very little. Once a year, inspect for:
Wood parts still need normal care, including sealing or staining when appropriate. The big win is that the structural support is far less likely to rot away underground.
Yes, often. We always recommend checking current 2026 local requirements before work begins.
Common items regulated by town or city rules include:
If there is an HOA, add its rules to the list too.
For most 6-foot wood privacy fences, a good baseline is:
That baseline may change based on heavy panels, horizontal slats, poor soil, or exposed windy locations.
If you want a wood fence that lasts, metal posts are usually the smartest foundation. They resist rot, handle moisture better, stay straighter, and can extend the life of a wood fence by two to four times compared to all-wood construction.
The best results come from a few core practices:
That is the real answer to how to install metal posts for wood fence the right way: strong layout, proper footing, careful alignment, and no shortcuts where water can win.
If you want professional help with a durable wood fence built for New England conditions, learn more about Brentwood Fence LLC's wood fencing services here: Wood fencing installation services.

Copyright 2022 Brentwood Fence | All Rights Reserved | Sitemap | Website by Plumb Development a Digital Marketing Agency