Blog Content
27
Nov
2025

A wooden gate installation is a crucial project that improves your property's security, curb appeal, and functionality. A well-installed gate completes your fence and provides convenient access, but its foundation lies in properly set posts—a detail that separates success from costly failure.
Quick Answer: Key Steps for Successful Wooden Gate Installation
As one experienced contractor noted, "Gates are not that easy to build correctly. Most gates I've seen are in various states of disrepair." This highlights why many homeowners choose professional installation. Common DIY issues like posts out of level, sagging gates, and crumbling concrete footings often result from shortcuts and can cost hundreds to repair.
This guide will walk you through the essential steps and critical decisions that ensure your wooden gate operates smoothly for years to come.

Relevant articles related to wooden gate installation:
Every successful wooden gate installation begins with a solid plan that matches your practical needs, property style, and budget. The first step is determining the gate's purpose. A pedestrian gate for a backyard has different requirements than a wide driveway gate for vehicles.
Pedestrian gates are typically 36 to 48 inches wide, while driveway gates often span 10 feet or more. Custom dimensions may be needed to match unique spacing or existing fence lines.
The wood you choose impacts both appearance and longevity. Your gate must withstand sun, rain, and snow, making the right species critical.
More info about Types of Wood Privacy Fences NH, MA, ME
Professional installation requires specific tools and quality materials for a long-lasting result.
Pre-drilling pilot holes before driving screws is a crucial professional step that prevents wood from splitting.
The perfect gate is both functional and aesthetically pleasing. When measuring the opening, you must account for clearance for hinges and latch hardware—typically around 3/4 inch for walk gates. Getting this wrong means the gate won't fit or close properly.
Walkway gates (36-48 inches) are ideal for most residential needs, while driveway gates (10+ feet) require reinforced construction and heavier hardware to prevent sagging. For the best visual harmony, the gate style should match your existing fence.
More info about Residential Fencing Options NH, MA, ME

The difference between a gate that lasts two decades and one that sags in two years is the quality of the installation. A professional wooden gate installation focuses on precision and alignment, ensuring your gate will open and close smoothly for years, regardless of the weather. Every step, from post depth to concrete mixing, impacts long-term performance.
More info about Professional Fence Installation 101
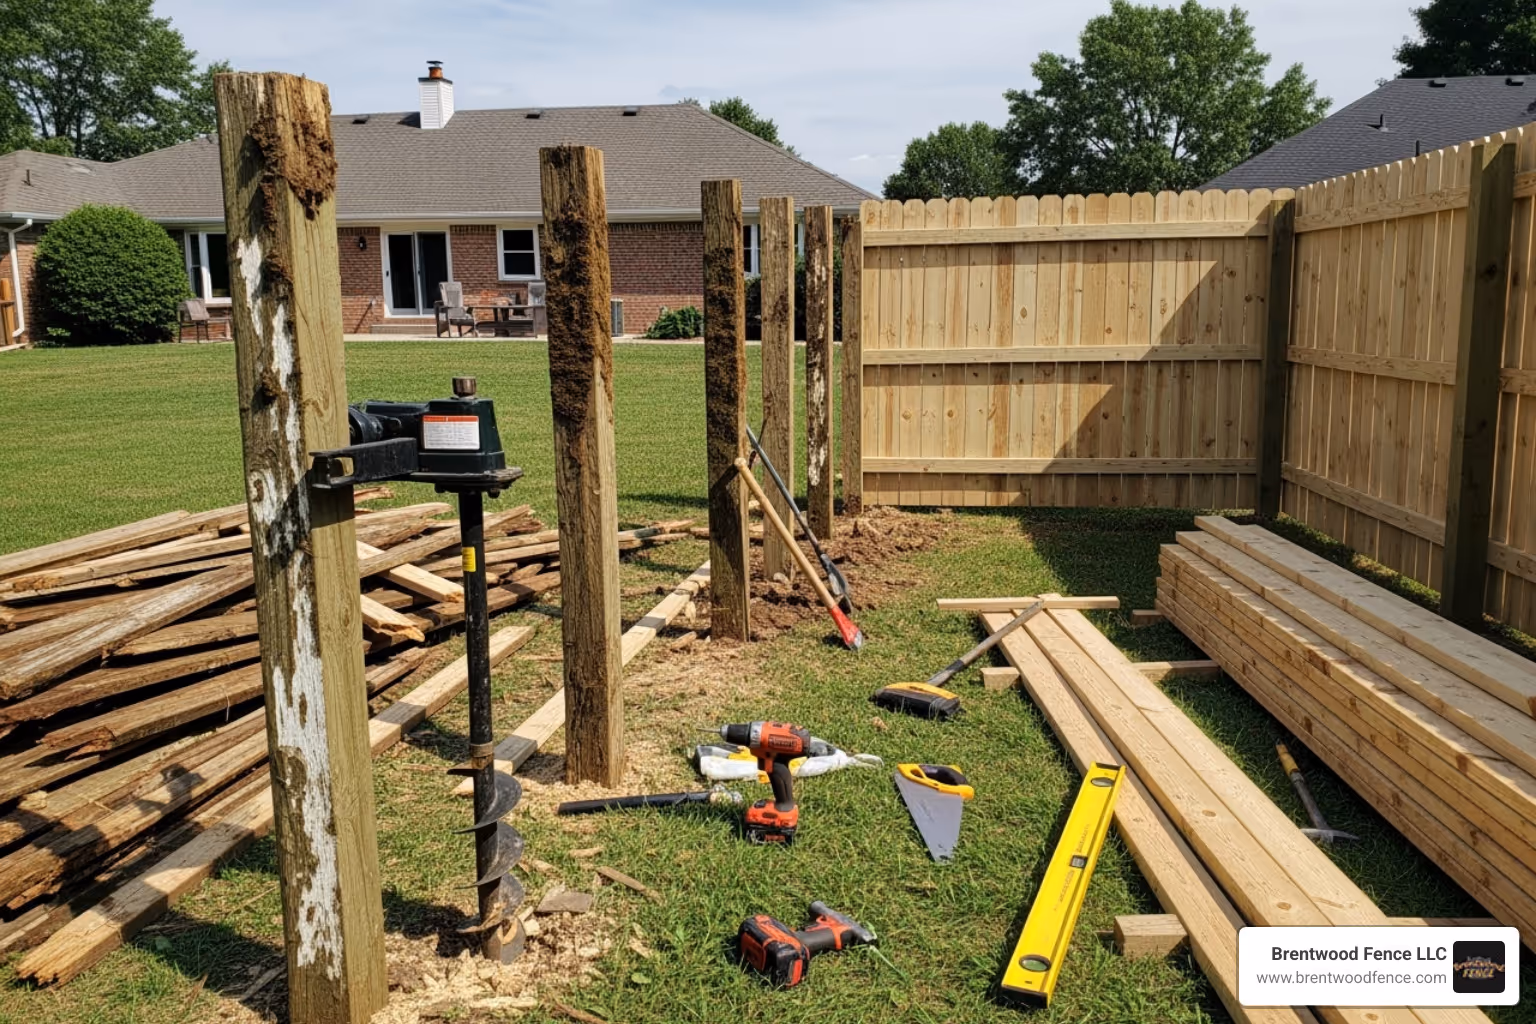
Proper preparation is the foundation of a sturdy gate. We begin by marking post locations, typically about 4 inches inside the property line to keep concrete footings contained. Before any digging, it is legally required and essential for safety to CALL DIG SAFE to locate underground utility lines.
Post holes must be excavated to at least 30 inches deep—or roughly one-third of the post's length—to create a stable anchor. We then set the posts, using a 4-foot level to ensure they are perfectly plumb in both directions. Even a slight tilt can cause a gate to drag or swing on its own.
We mix concrete to a stiff consistency to maximize strength and fill the hole, tamping it to remove air pockets that can lead to crumbling. The top of the footing is crowned to shed water away from the wood post, preventing rot. These details are what make a professional installation last.
More info about Installing Wood Fence Panel with Metal Posts
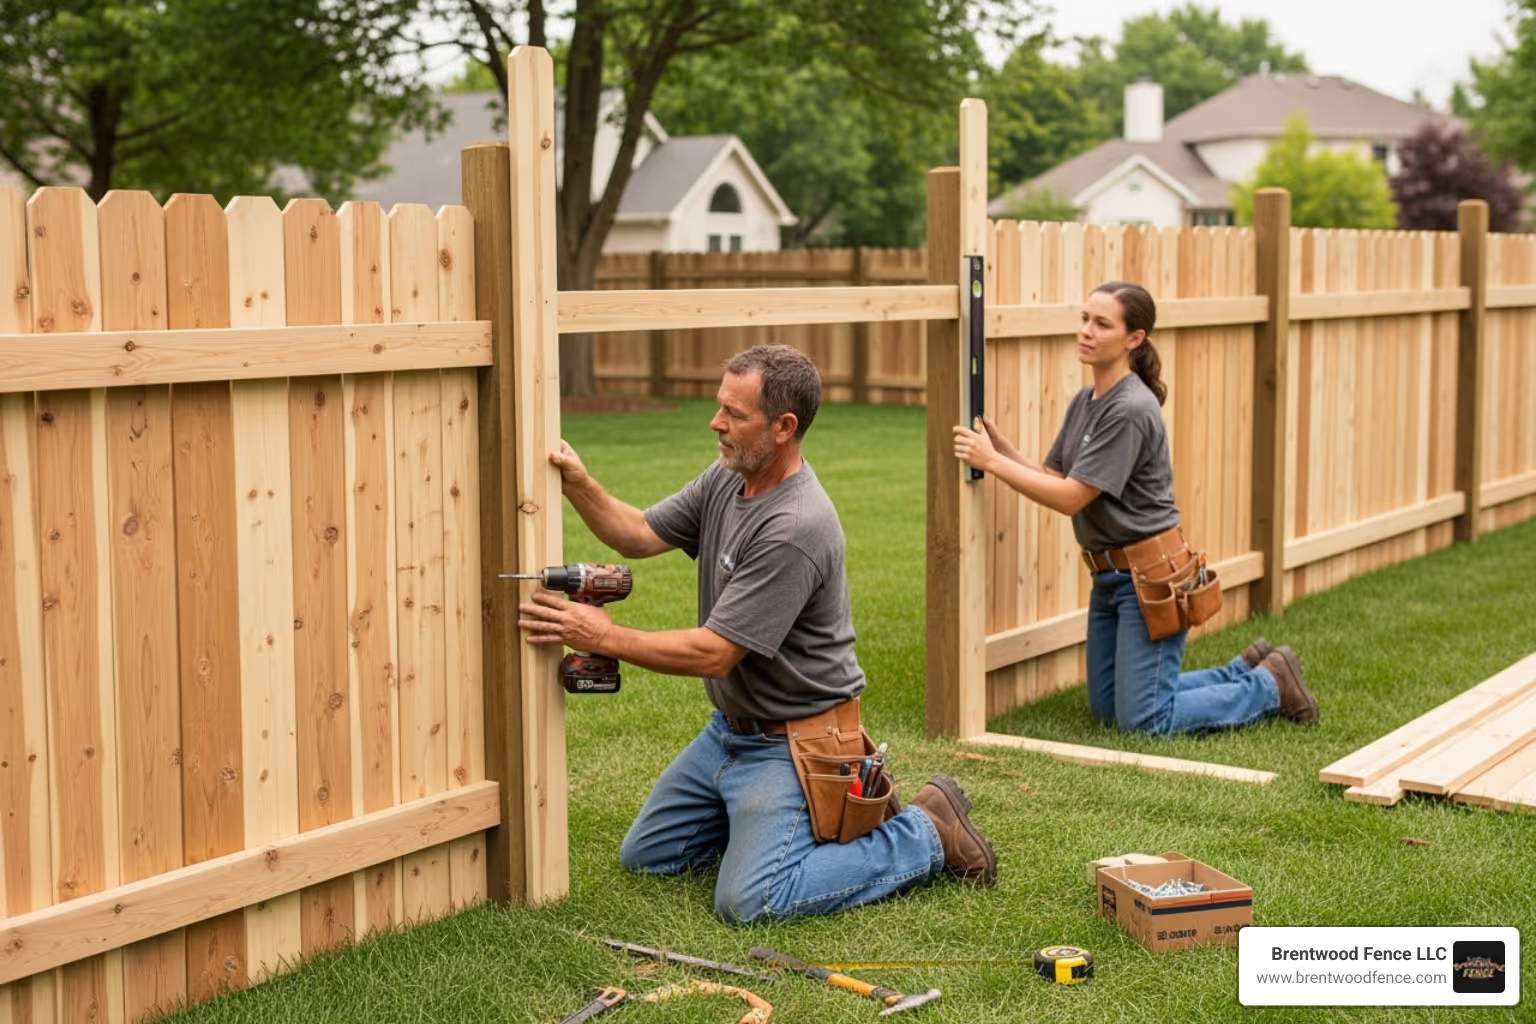
With the posts set, we assemble the gate frame. We use exterior wood screws instead of nails, as screws provide superior holding power and resist loosening over time, which is a primary defense against sagging. All holes for screws and lag bolts are pre-drilled to prevent the wood from splitting, a critical step for structural integrity.
We use temporary supports to hang the gate, allowing us to position it at the perfect height and angle before attaching hardware. A consistent ground clearance of 1 to 2 inches is maintained. This prevents the gate from dragging as the ground freezes or swells but is small enough to contain pets.
Before finishing, we test the gate's swing operation repeatedly to ensure it moves smoothly and latches securely without resistance. We make final adjustments to the hinges or latch as needed to guarantee flawless performance.

Watching a new gate sag over time is frustrating. Fortunately, a properly executed wooden gate installation prevents common issues like sagging, sticking, and warping from the start by focusing on structural integrity.
The secret to a sag-free gate is building to counteract gravity. This is achieved through several key elements:
Even well-installed gates may need occasional adjustments as wood responds to weather.
While minor hinge adjustments are manageable, persistent sagging or post instability requires professional diagnosis and repair to avoid causing further damage.
The final phase of a wooden gate installation is where functionality meets beauty, changing the gate into a welcoming entry point. These finishing touches are what you'll see and use every day.
More info about Gates, Arbors & Fencing Installation Services
Gate hardware must be both attractive and strong enough to handle daily use for decades. We select components based on the gate's weight and intended function.
Proper placement is critical. Hinges are aligned on the gate's horizontal rails, and latches are set at a comfortable height. We use strong lag screws and pre-drill all holes to attach hardware, ensuring it won't loosen over time.
Your gate can be customized with decorative elements like unique picket patterns, lattice work, or ornamental hardware to match your home's style. For driveway gates, we can coordinate the installation of automatic openers and gate stops. Security features like self-closing hinges or advanced locks can also be added.
To ensure longevity, wood needs protection from the elements. Here are the essential maintenance steps:
Simple preventive care protects your investment and ensures your gate works properly for decades.
Here are answers to common questions from homeowners in New Hampshire, Massachusetts, and Maine.
A standard walkway gate installation typically takes a few hours to a full day. More complex projects, like custom driveway gates or installations on difficult terrain, may take longer. We provide a realistic timeline upfront and work efficiently without sacrificing quality.
For New England's climate, Cedar and Redwood are top choices due to their natural resistance to rot and insects. Redwood is particularly stable and resists warping. Pressure-treated pine is a solid budget-friendly alternative but requires more diligent maintenance to maximize its lifespan.
The cost of a wooden gate installation varies based on several factors. The main variables are the gate's size and type (walkway vs. driveway), the wood species (Redwood is more expensive than pine), design complexity, and hardware choices. Site conditions like rocky soil can also influence labor costs.
While DIY material costs might seem low (around $140 for a basic kit), professional installation includes expertise, proper tools, and the guarantee of a gate that functions correctly for years. We provide a detailed, transparent quote for every project, ensuring you understand the investment in your property's security and curb appeal.
More info about the Cost of Wood Fence Installation NH, MA, ME
A professional wooden gate installation transforms your outdoor space, providing security, beauty, and convenience. The difference between a gate that lasts for decades and one that fails in a year lies in the details: proper post setting in deep concrete footings, correct diagonal bracing, heavy-duty hardware, and quality wood selection.
While a DIY approach is tempting, common mistakes like improper post alignment or weak footings lead to premature sagging and costly repairs. A professionally installed gate provides peace of mind, ensuring reliable performance season after season.
At Brentwood Fence LLC, we've built our reputation on this attention to detail. We serve homeowners and businesses throughout New Hampshire, Massachusetts, and Maine, including communities like Exeter NH, Portsmouth NH, Manchester NH, Concord NH, Derry NH, Dover NH, and Haverhill MA. Our team brings the expertise to get the job done right the first time.
Ready to improve your property with a gate that combines beauty, security, and lasting performance? We're here to help.

Copyright 2022 Brentwood Fence | All Rights Reserved | Sitemap | Website by Plumb Development a Digital Marketing Agency