Blog Content

2
Jul
2026
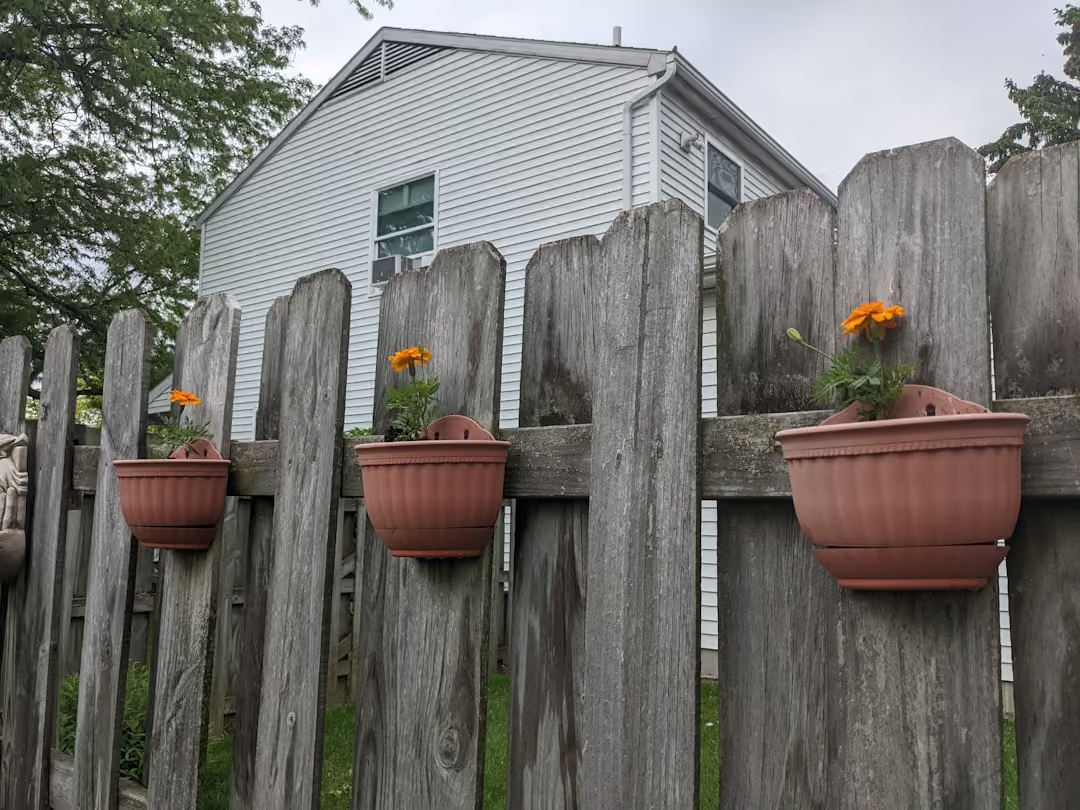
If you've been researching DIY fence ideas, you're not alone. DIY fence projects have surged 35% in popularity since 2020, driven largely by rising contractor costs and a desire for more control over home improvement projects.
Here are the most popular DIY fence styles homeowners are building right now:
The appeal is real. Homeowners who go the DIY route typically save $2,000–$4,000 compared to hiring a professional, and over 65% finish the job in under a weekend.
But there's a catch.
A fence is only as good as its foundation. Poor post depth, wrong fasteners, ignored wood movement — these are the mistakes that turn a weekend project into a multi-season headache. Before you grab a post-hole digger, it pays to understand exactly what you're getting into.
This guide walks you through the best backyard fence designs you can realistically build yourself — plus the planning, materials, and skills each one actually requires.

Essential diy fence ideas terms:

When exploring cost-effective ways to secure your property, finding the balance between upfront cost savings, long-term durability, and aesthetic appeal is key. A cheap fence that falls over during a classic New England winter storm is no bargain at all.
Before diving into specific designs, it is important to understand your goals. Are you looking for absolute seclusion, or are you simply trying to keep a beloved pet from wandering off? Exploring various Privacy Fence Ideas can help you narrow down whether you need a solid barrier or a semi-private design.
For homeowners in New Hampshire, Maine, and Massachusetts, selecting the right materials is the first and most critical step. The local climate brings heavy snow, high humidity, and intense freeze-thaw cycles, meaning your material choice directly dictates the lifespan of your fence. Let's look at the most popular budget-friendly backyard styles.
Wood remains the most beloved fencing material for its classic warmth and natural beauty. If you are aiming for a highly economical project, building a pallet fence has emerged as a incredibly popular trend. By sourcing free or low-cost shipping pallets from local businesses, you can construct a rustic boundary for a fraction of the cost of retail lumber. According to the step-by-step guide on Pallet Fence: How to Build a DIY Fence from Pallets (2026) - D and G Flooring , a pallet fence can cost as little as $4 to $8 per linear foot, compared to $15 to $35 for traditional wood privacy fencing.
However, pallet wood varies wildly in quality. When utilizing reclaimed wood, you must look for safety stamps like "HT" (Heat Treated) and avoid pallets marked "MB" (Methyl Bromide), which indicates treatment with harmful chemicals. Unfinished pallet wood also deteriorates rapidly in our humid summers and freezing winters, typically lasting only 5 to 10 years even with diligent weatherproofing.
For a more permanent structure, standard lumber is the way to go. You will want to explore different Wood Fencing Styles NH MA ME to see how different board configurations perform. The two most common options are:
If you prefer a classic, welcoming look for a front yard rather than a towering privacy barrier, a traditional picket design is an excellent choice. You can consult our Wood Picket Fence Install Guide to learn about picket spacing and layout fundamentals.
If traditional vertical pickets feel a bit too old-fashioned for your home's aesthetic, modern minimalist designs offer a sleek alternative. One of the biggest trends in Modern Fence Ideas 2026 is the horizontal slat fence. By running the boards horizontally rather than vertically, you emphasize the width of your property, making smaller yards feel significantly larger and more open.
Horizontal fences can be customized in several ways to achieve different levels of privacy and airflow:
Integrating these modern styles into your overall Backyard Privacy Design allows you to turn a simple boundary marker into a stunning architectural feature. If you are focusing on the curb appeal of your street-facing property, check out these creative Front Yard Fence Ideas to find a style that complements your home’s architecture.
The secret to a successful fence installation does not lie in how straight you nail the boards; it lies in the hours of preparation before you ever touch a hammer. Skipping the planning phase is the fastest way to end up with a costly neighborhood dispute, a call from the local utility company, or a fence that heaves out of the ground after the first winter frost.
Before purchasing any materials, you must address these four critical preparation steps:
To help you decide which material fits your budget, skill level, and durability needs, review this comparison of common DIY materials:
For a comprehensive breakdown of wood installation techniques, refer to the How to Install a Wood Fence — Step-by-Step DIY Guide (2026) to understand the precise measurements and structural requirements of a standard build.
Once your planning is complete, it’s time to lay out the fence on the actual ground. Professional installers use a system of stakes, batter boards, and mason line to ensure the finished fence is perfectly straight.
Start by placing stakes at the exact locations of your corner, end, and gate posts (known as terminal posts). Run a tight mason line between these stakes. To keep the line from shifting, construct simple wood batter boards just outside the perimeter. This allows you to adjust the string line easily without losing your reference points.
Next, mark your line post locations along the string. For most wood fences, posts should be spaced exactly 6 to 8 feet apart. If you are using pre-assembled panels, your post spacing must match the panel width exactly (typically 8 feet). For more details on handling panel systems, see our guide on How to Install Wood Fence Panels ME NH.
If your yard isn't perfectly flat, you must also plan how the fence will traverse the terrain. There are two primary methods for building on a slope: the stepped method (where the fence panels remain level but drop down like stairs) and the sloped/raked method (where the rails run parallel to the ground). Learn how to navigate these challenges in our guide on Installing Wood Fence on a Slope.

While DIY videos on social media make fence building look like a breezy afternoon project, the physical reality is incredibly demanding. Digging dozens of deep holes, mixing hundreds of pounds of concrete, and handling heavy lumber requires serious stamina and precision.
One of the greatest challenges in our region is the soil itself. New England is famous for its rocky, clay-heavy soil—often referred to as "New England potatoes" (large granite stones buried just beneath the surface). A manual post-hole digger will quickly stall against these rocks, often requiring a heavy-duty digging bar, a demolition hammer, or a gas-powered auger to make any progress.
In addition to the physical toll, wood is a natural, dynamic material. As explained in the technical woodworking guide on Custom Solutions for Building Your Own Fence (DIY Innovations) , wood expands and contracts 5% to 10% across the grain with seasonal humidity shifts. If you nail your pickets tightly together without leaving a small gap (typically 1/4-inch), the boards will buckle, warp, and split as they swell during wet seasons.
Furthermore, using the wrong fasteners can ruin your fence. Standard interior screws or cheap zinc-plated nails will quickly corrode when they come into contact with the corrosive copper chemicals in pressure-treated lumber, leading to ugly black streaks and structural failure. Always use hot-dipped galvanized or stainless steel fasteners.
The strength of your entire fence rests on how well your posts are anchored. To prevent rot and movement, follow these professional steps for setting posts:
For beginner woodworkers assembling their own custom panels, keeping the boards flat and square during assembly can be incredibly frustrating. In the woodworking tutorial DIY Garden Fence with Gate: Tips for New Woodworkers (Mastering Bench Dogs) , experts recommend using a flat workbench with "bench dogs" (clamping pegs) to hold the fence rails perfectly square while you attach the pickets. This simple shop-made solution prevents the panels from bowing or twisting before they are hung.
Once your fence is built, the clock starts ticking. Unfinished wood exposed to New England's harsh sun and heavy precipitation will turn gray within months, and structural cracking can begin within a year or two.
To protect your investment, you must establish a strict weatherproofing schedule. According to Cost-Effective Ways to Build Durable Fence Panels (Budget-Friendly Tips) , applying a high-quality exterior stain or sealant with built-in UV blockers can extend the life of your wood by up to 300%.
The average cost of a DIY fence installation is 50% to 70% lower than hiring a professional contractor. Homeowners typically save between $2,000 and $4,000 on a standard backyard project.
However, these savings must be weighed against the cost of your time, tool purchases or rentals (such as augers, miter saws, and nail guns), and the risk of making costly mistakes. To get an accurate picture of what professional installation actually costs in our region, check out our Wood Fence Install Cost Guide 2026 and our breakdown of the Cost Per Ft Wood Fence.
In most municipalities throughout New Hampshire, Massachusetts, and Maine, a building permit is required for any fence over 6 feet tall. However, even if a permit is not required for a shorter fence, you must still strictly adhere to local zoning codes regarding setbacks, property lines, and visibility restrictions near driveways and intersections. Always check with your local town hall or building department before purchasing materials.
The lifespan of a wood fence depends heavily on the materials used and how well they are maintained:
If you are looking for a longer-lasting, zero-maintenance alternative, you may want to consider other materials. Explore our Vinyl Fence Installation Tips or read about the process of Putting in a Vinyl Fence NH MA ME. You can also use our Vinyl Fence Price Estimator to compare costs. For those interested in metal options, check out our Aluminum Fence Installation 2025 Guide or our guides on Chain Link Fence Materials and 6 Ft Chain Link Fence Installation Guide.
Building a DIY fence is a major undertaking that requires immense physical labor, specialized tools, and meticulous planning. While the idea of saving money is appealing, the reality of digging through rocky New England soil, mixing concrete, aligning heavy panels, and fighting the elements can quickly turn a weekend project into an exhausting, multi-week ordeal.
If a fence is not installed perfectly plumb and below the frost line, it will begin to lean, warp, and sag within just a few seasons—ultimately costing you more in repairs and replacement materials than you saved on initial labor.
Why spend your hard-earned weekends doing backbreaking labor when you can have a flawless, structurally sound boundary built by local experts? At Brentwood Fence LLC, we bring decades of experience, professional equipment, and deep knowledge of New England's unique soil and climate conditions to every project. We serve homeowners across Exeter NH, Portsmouth NH, Manchester NH, Concord NH, Derry NH, Dover NH, and Haverhill MA, delivering beautiful, durable fences that stand the test of time.
Skip the rental center, the sore muscles, and the DIY headaches. Let our team handle the hard work for you.
Get a professional wood fencing installation quote today, and let us bring your dream backyard to life!
Copyright 2022 Brentwood Fence | All Rights Reserved | Sitemap | Website by Plumb Development a Digital Marketing Agency